

Green Tea Macarons with Ginger Buttercream


Macarons are an iconic cookie that I’m pretty sure most of us have drooled over at one point in our lives. But they are notoriously difficult to make. I decided to try these on my own for the first time. For this recipe I decided to make green tea macarons with a ginger buttercream filling. I even got to interview another macaron pro!
This page contains affiliate links which means I may earn a commission as an Amazon Associate (or other affiliate program) from qualifying purchases. I only recommend products that I use and trust.
My Macaron History
So, I actually have made macarons once before in a macaron class at my local community college. You can read everything I learned from that class if you want some great tips. It was a great experience, but ours turned out pretty ugly. But super tasty! I figured out where I went wrong and had a lot of confidence about round two.
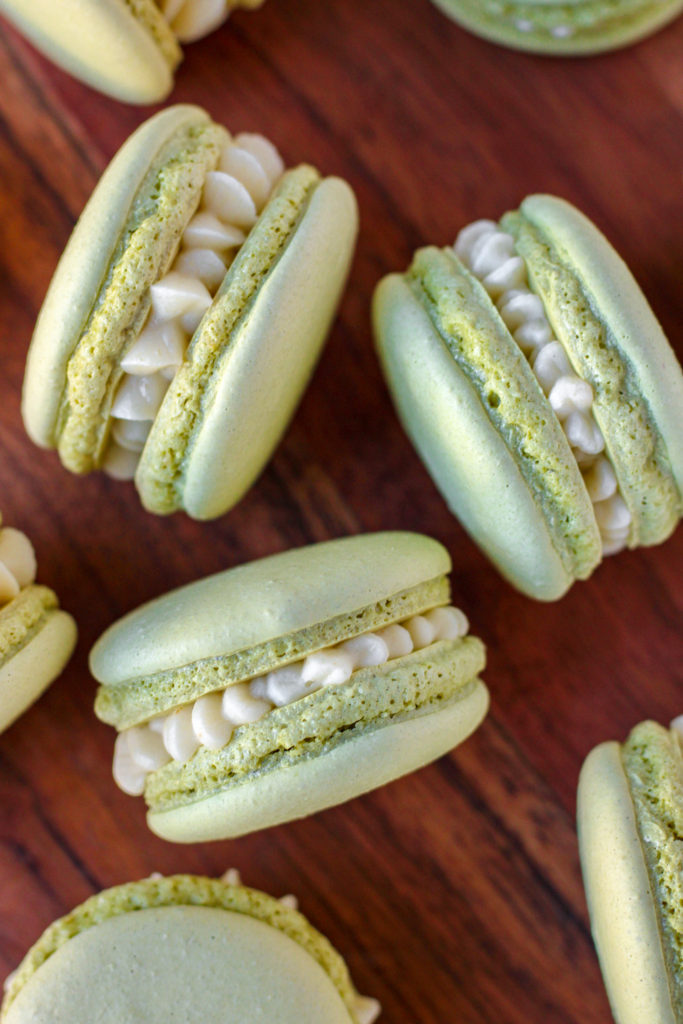
It took me six months to get around to it, but I finally whipped up some green tea macarons on my own! I love the floral, earthy taste of matcha powder and throw it in smoothies all the time. To pair with that flavor, I decided to make a ginger buttercream that would have a bit of zing. If you want to know how much I love ginger, read about these Cranberry Ginger Bran Muffins.
I’ve recently made my green tea and ginger macarons again because I love them so much! This post is being updated with fresh photos on March 19, 2021.
Blunders
I seriously thought this post was going to have to be all about the ginger frosting because the macarons were not shaping up well at first. My first issue was making the sugar syrup. I used a pot that was too big and kept getting inconsistent temperatures. Then I thought my meringue was a little soft. Yikes!
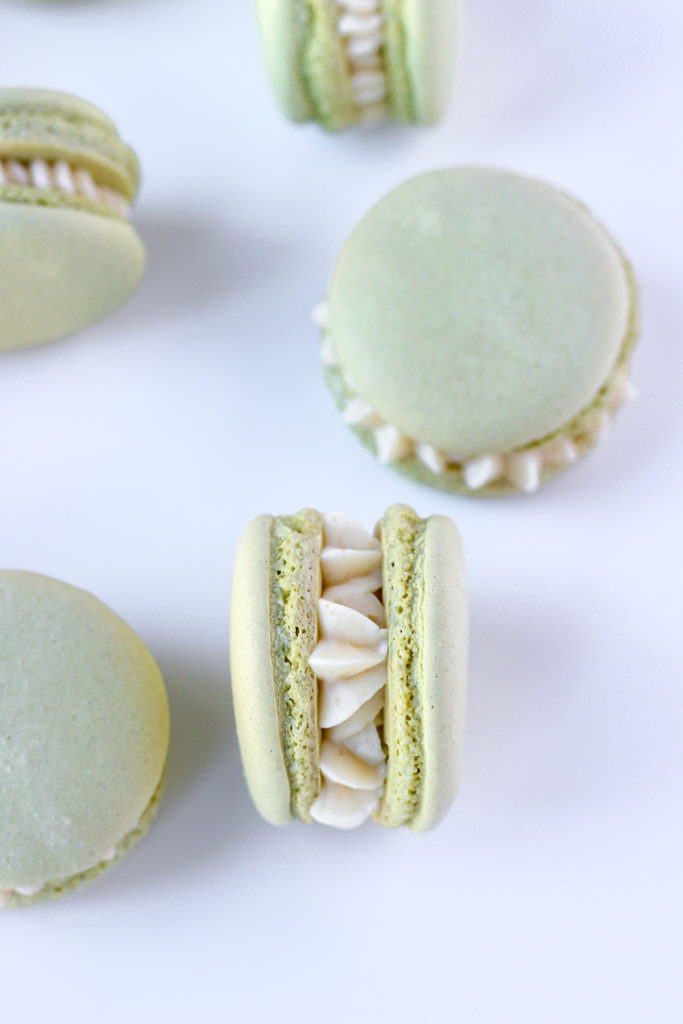
But I felt pretty good after I combined the meringue with the matcha base. Maybe these green tea macarons would work out! The first batch came out so ugly. I mean, burnt bottoms, cracked tops, no feet. Yuck. But the rest came out perfect!
The second time I made them, I ended up with more lopsided macaron shells than I liked. It was an easy fix to turn my oven temperature down to 275℉. Don’t be afraid to adjust your oven temperature as necessary. I turned my lopsided macarons and leftover egg yolks into macawrong brownies!
Print Recipe
Green Tea Macarons
Once I took out the second batch of green tea macarons, I let out a huge sigh of relief. It worked! I did it! You can see lovely ruffled feet and a smooth, flat top. And the flavor is beautiful. Just enough matcha to give you a pleasant flavor without it being overpowering. The ginger buttercream has just a tiny bit of spice to it and pairs beautifully with the shells.
Tips & Tricks
Okay, here’s what I learned from this specific batch.
- It’s important to use the smallest saucepan you can to make the sugar syrup. This will make sure you are getting accurate temperature readings.
- Pipe the batter just shy of the edge of the circle on the template. They will spread a bit when you bang the baking sheet.
- Bake one sheet at a time. Not only will you get more even baking, you can adjust the oven temperature for subsequent trays if necessary.
- Make sure the tops of the macarons are dry before baking. They shouldn’t stick to your finger at all when you gently tap them.
Interviewing a Macaron Master
Starting Bakes & Blunders has been an incredible journey and along the way I have had the pleasure of meeting some fantastic bakers all around the country. That’s how I met Heather Boyd Martin, a true Macaron Master. You can find her tasty bakes on Facebook and Instagram. And if you are lucky enough to live in Texas, you can place orders with her or even take a macaron class! Heather was so kind to answer some questions about common macaron failures.
Related Reading: Basic Tools You Need To Make Macarons
Problem: Burnt Bottom
Cause: Your heat is too high or your tray is too close to the heating element.
Fix: Turn down heat, select a higher rack in your oven (or move your rack), or use a silicone mat. Silicone mats absorb heat differently than Teflon or parchment and usually bakers who use mats need to add time to their bake times. So using a silicone mat will keep your macarons from coming in contact with the metal pan. You can also place an extra, empty tray under your tray. Again it creates a barrier between your pan and the heat.

Problem: Cracked Tops
Cause: You skipped steps, either dropping your tray or letting them rest in high humidity.
Fix: Drop the tray on the counter. I do this about 10 times before resting. OR… Let macarons rest until they form a skin (dry to the touch and have a matte finish).
Problem: Spreading
Cause: You’ve over mixed your batter.
Fix: There’s no fix. They will look flat but they will taste fine. Enjoy them anyway. This part of making macarons is the most challenging and where most go wrong. Once your meringue is combined with your dry ingredients, fold a few times and then lift a spatula full of batter out of the bowl and let it fall back in the bowl. If it is clumpy, fold 10 more times and test again. Do this until it until it ribbons off your spatula without breaking. It’s VERY easy to overmix, so when I get close, I literally fold ONCE and test it. Fold it once more and test again.
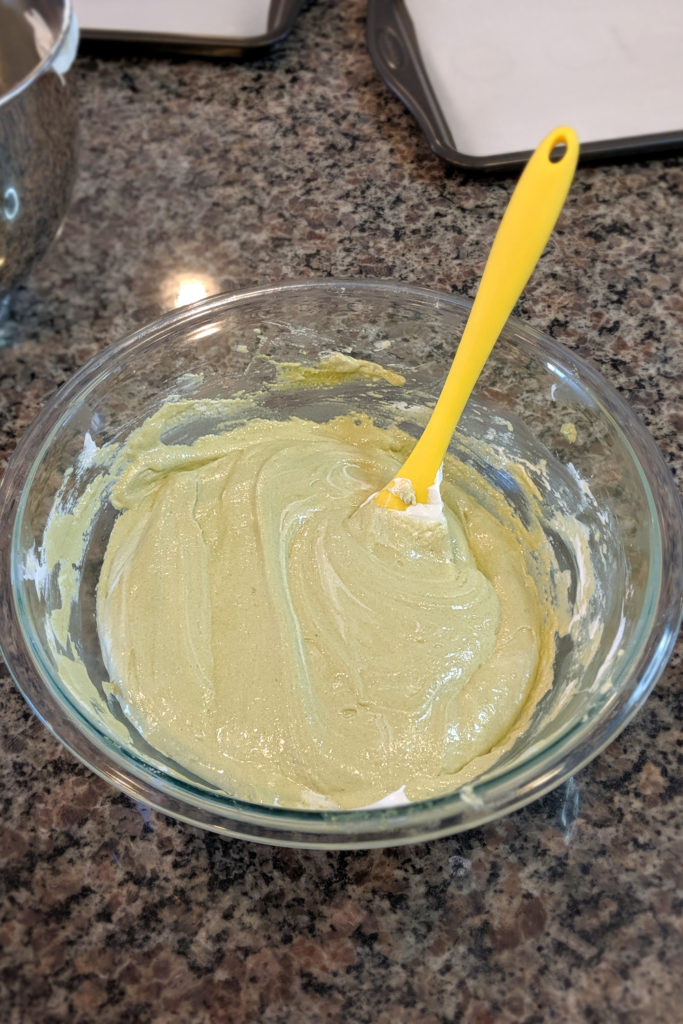
The goal is to have it flow off your spatula like lava PLUS the lava flow or ribbons that you formed in the bottom of your bowl will disappear on their own in 10-30 seconds. If they don’t disappear, your piped macarons will have peaks (they look like nipples). Unfortunately, there is a very short window between under and over mixed batter. That said, even cracked macarons taste delicious, so just eat them to hide the evidence.
Problem: Browned Tops, Under Cooked Bottoms
Cause: After much trial and error I discovered that my ancient oven was the problem. It liked to turn up the heat all the time and because the heating element was on the top, it would kick on and brown the tops before the bottoms were done. I was baking one tray, with a silicone mat, on 300℉ for 15 min, turning my tray after 8 min to ensure even baking (front/back).
Fix: So I added a Pampered Chef stone to the top rack. This created a barrier between the heating element and my macarons, plus it holds heat, which meant I wasn’t loosing so much heat when I opened the door. I also stopped turning my tray because I had pretty even baking front to back. Plus I lowered my temperature to 275℉ and increased the time to 20 min.
What Type of Meringue Do You Prefer?
I learned French and it’s what I’ve stuck with. It’s the easiest to master because it doesn’t require cooking sugar. That said, it’s also the least stable.
At What Temperature Do You Bake Your Macarons?
I have brand new double ovens from LG. I baked at 300℉ for 16-18 min. Every oven is as different as the bakers who make macarons. What works for one person might not work for you. My recommendation is to start with one tray in the center of your oven, set temp to 300℉ and bake for 15 min. Remove the tray and let it cool completely. Treat it like the scientific method from 7th grade science class: write down what you did and the results. Then only change one thing and bake the second tray until you can bake with similar results.
Final Tip
New bakers should expect to try a few times before finding success. It’s not as easy as a chocolate chip cookie, so give yourself time to become proficient. Also if you can find a class near you, spend a day learning with someone while you actually make them. It helps a lot. YouTube is a great resource but live, in person help can’t be matched.

Also I use a fan to help skin form faster and to help macs cool out of the oven. In high humidity it’s super helpful. I rest my macarons between 30 min-1 hr. I share this resource with my students. Mimi has a very comprehensive troubleshooting guide.
Silicone Mat vs. Parchment Paper
I used both silicone baking mats with a macaron template and parchment paper with a template underneath. They each have unique pros and cons. Fun Fact! You can now find a FREE macaron template in the Bakes & Blunders Resource Library. Print it off and place it under your parchment paper, pipe your macs, then slip the template out very carefully.
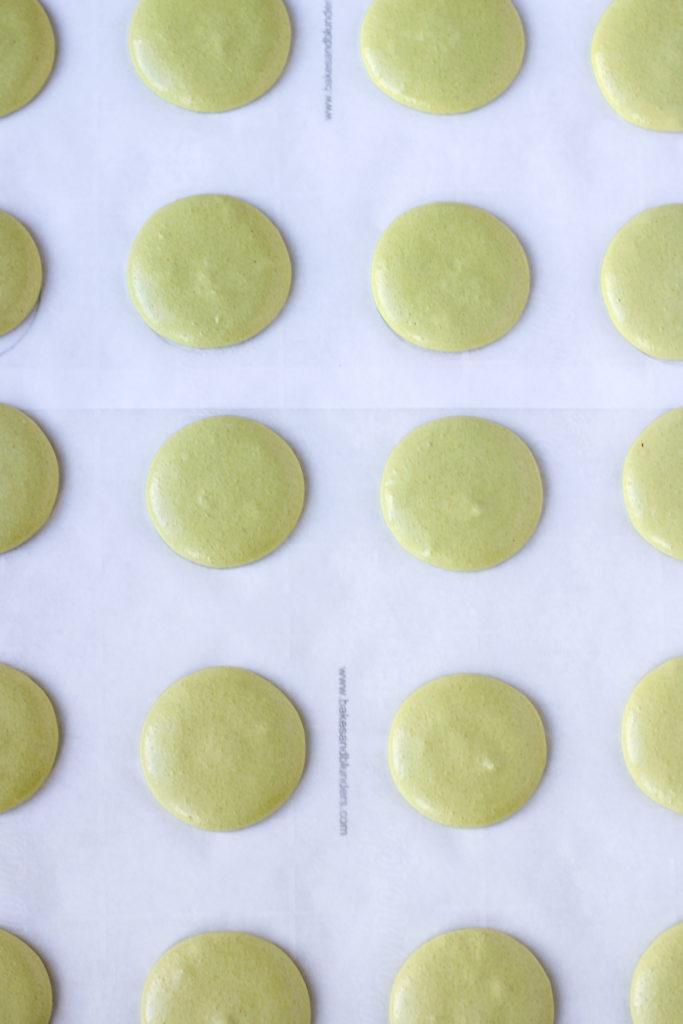
The silicone baking mats have spots for 30 macarons on each. They were perfectly flat and I got a lot out of each baking sheet. But they don’t let the macarons dry out as well and stick to the mat a bit. When I used parchment paper, the paper crinkled up a bit because of the wet batter which created irregular shapes. But they released much easier.
Right now, I’m actually diggin’ teflon sheets over silicone mats. If you only plan on making macarons on occasion, parchment might just be your best bet. But if you plan on making macs regularly, I would experiment with all of the options to find out what works best for you.
Related Reading: Dairy Free Vanilla Macarons
Fun Ways to Fill Macarons
Don’t forget to breathe once those little beasts, I mean, beauties come out of the oven. The hardest part is over. Now you’ve just got the easy bit… filling them! There are so many fun ways to fill macarons. Check out this video to see how I use different piping tips and fillings to create unique macs.
Enjoy!

Step outside your comfort zone and try these green tea macarons with ginger buttercream. The unique flavor combination of earthy matcha and zingy ginger is delicious and unique. Macarons are tricky, but you’ll never learn how to make them unless you give them a go!
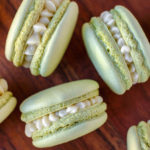
Green Tea Macarons with Ginger Buttercream
Ingredients
Macaron Base
- 212 grams almond flour or any nut flour
- 212 grams powdered sugar
- 1 Tbsp matcha powder
- 82 grams egg whites room temperature
Italian Meringue
- 90 grams egg whites room temperature
- 236 grams granulated sugar
- 90 grams water
Ginger Buttercream
- 4 oz unsalted butter softened
- 8 oz powdered sugar sifted
- 1/4 tsp vanilla
- 1 tsp ground ginger
- 1- 3 tsp milk or cream
- Crystallized ginger optional
Instructions
Green Tea Macarons
- Cut parchment paper to fit your baking sheet or line with silicone mats. Set aside.
- Place almond flour and powdered sugar in a food processor and pulse to grind as finely as possible.
- Sift the almond flour, powdered sugar, and matcha powder into a bowl, discarding any large bits, and whisk to combine. Make a well in the center of the dry ingredients. Add the 82 grams of egg whites. Stir to completely combine the ingredients. It will be a thick paste. Cover with plastic wrap.
- Place the 90 grams of egg whites for the Italian Meringue into the bowl of a standing mixer with a whisk attachment.
- In a small saucepan, combine the granulated sugar and water and place over medium- high heat. DO NOT stir once the sugar begins to boil. Stir just to combine and leave it be after that.
- When the sugar hits 203℉ begin to whip the egg whites in the stand mixer at medium speed to soft peaks. If the egg whites hit soft peaks before the syrup is ready, bump the speed to low.
- Once the syrup hits 245℉, remove from the heat. Bump the mixer's speed down to medium- low and very slowly pour the syrup into the bowl, making sure not to hit the whisk. It's best to aim for the edge of the bowl.
- Increase the speed to medium (4 on a KitchenAid) and whip for about 10 minutes, or until the whites hold thick, glossy peaks. You will not have stiff peaks, but when you flip the bowl upside down, the meringue shouldn't move.
- Stir about ⅓ of the meringue into the flour mixture until well combined. You can be a bit rough with this first addition. Now gently fold in the remaining meringue until you reach "ribbon stage". You should be able to lift some batter and drizzle a figure 8 in the bowl before it sinks back into the mixture.
- Transfer the mixture to a large pastry bag fitted with a round tip (#12). Holding the bag straight up, pipe circles onto your baking sheet by applying even pressure (don't try to draw a circle). If you are using a template, you want to fill the circles until just shy of the edge. They will spread a bit in the next step.
- Firmly bang baking sheet on the counter several times to even the batter and loosen any air bubbles. Use a toothpick to pop any surface bubbles.
- Let the macarons sit on the counter for 30 minutes to an hour to form a skin. When you touch the surface it should feel dry.
- About 30 minutes before the macarons are ready to bake, preheat the oven to 275°F. Once the macarons are dry, bake one sheet at a time for 18 minutes, rotating the sheet every 6 minutes. The macarons are done when they release from the baking sheet easily. Keep an eye on them and adjust the baking temperature and time as needed.
- Cool on the baking sheet for 10 minutes before transferring to a cooling rack to cool completely.
Ginger Buttercream
- Beat the butter in a stand mixer on medium- low for about 5 minutes, or until the butter is pale and fluffy. Scrape down the bowl as needed.
- Add half of the sifted powdered sugar and the ginger (to taste). Beat on low until combined, then bump the speed to medium- low for a minute or two. Add the remaining powdered sugar and beat on low to combine, then on medium- low for a minute or two. Scrape the bowl down as needed.
- Add milk or cream a little at a time until the frosting is the right consistency. Beat on low to combine then on medium- low for a minute or two.
Macaron Assembly
- Pair up the macaron shells by size and fill a piping bag fitted with a round tip.
- Pipe a blob of frosting into the center of a macaron shell, stopping before the frosting reaches the edge. If you want an extra ginger kick, place a small piece of crystallized ginger in the center of the frosting. Top with the other macaron shell and press lightly to spread out the buttercream.
- Place the finished macarons in the fridge overnight. Take them out about 30 minutes before serving.
Notes
- Adjust the ginger and matcha amounts to taste.
- If you want a greener shell, add 3- 5 drops of food gel to the macaron base.
My Favorite Products for this Recipe

Colleen
Hi there! I’m Colleen, a novice baker with a passion for learning and improving my bakes… and blunders. On Bakes and Blunders, you can find all sorts of tasty recipes that range in difficulty, but most importantly, I’ll try to explain the reason behind important steps. If you know why a recipe works, you can tweak and adapt it to suit your unique tastes, and you’ll be able to reliably produce some very delicious treats. If you love baking and want to expand and grow your skills, or if you are a casual baker and just need some pointers, my blog is right up your alley! Join me on my baking journey and we’ll learn how to make more impressive recipes together.


2 Comments
Veronica Lee
Ooooo! I love, love, love macarons and these look amazing!
Colleen
Thanks! They’re tricky little treats, but soooo delicious 🙂