

Eggnog Cake with Rum Frosting for the Holidays


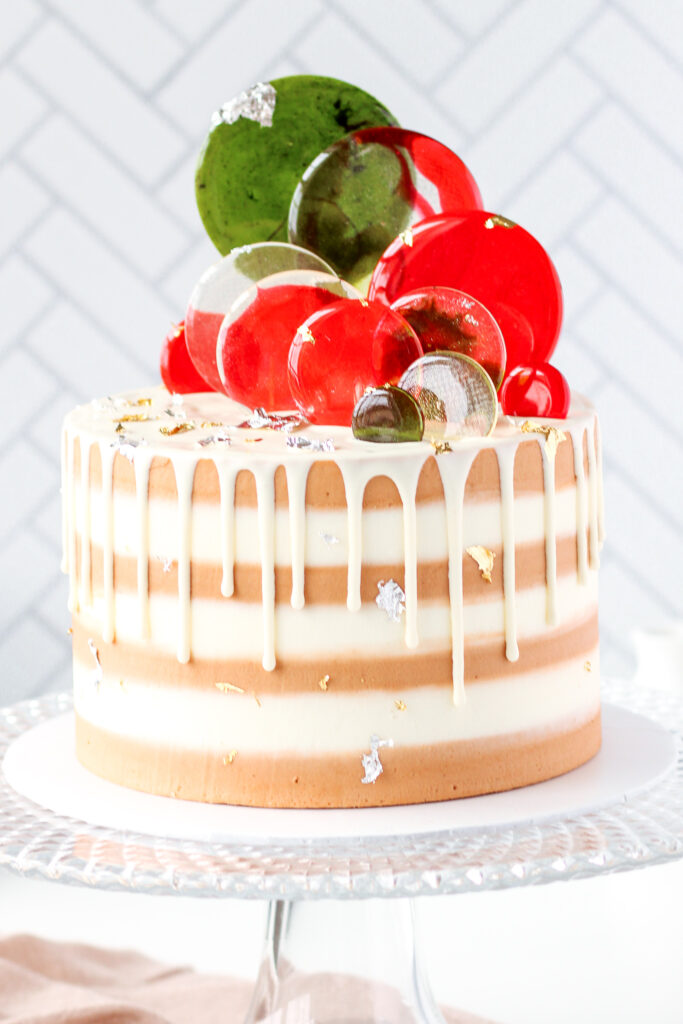
Eggnog is, by far, one of my favorite flavors of the season. The moment I see those glorious jugs of thick, holiday nog hit the shelves, I’m in the holiday spirit. This year, I decided I needed to find a way to enjoy this unique flavor in a baked treat. So, I give you Eggnog Cake with Rum Frosting!
This page contains affiliate links which means I may earn a commission as an Amazon Associate (or other affiliate program) from qualifying purchases. I only recommend products that I use and trust.
This recipe was originally published on November 28, 2019. It was republished on December 15, 2022 with updates.
Holiday Inspiration
This striped cake was my take on the November project with the Sweet Arts Guild back in 2019. I knew I was doing stripes, but I just couldn’t decide on the flavor. At first, I was going to do a chocolate cake with peppermint frosting, but I had other plans for that cake.
For inspiration, I opened my Starbucks app to browse their holiday flavors. The second I saw the eggnog latte, I knew what I was going to do. I’ve never actually had the eggnog latte, but I knew an eggnog cake was going to be the perfect holiday cake.
Eggnog Cake
I’ve been tweaking my cake recipes over the years, and decided that this yummy eggnog cake needed a reboot. Now, this guy is a mini cake. Sometimes you can’t tell the scale in pictures. You can absolutely double the recipe, but you’ll want to only slightly increase the frosting.
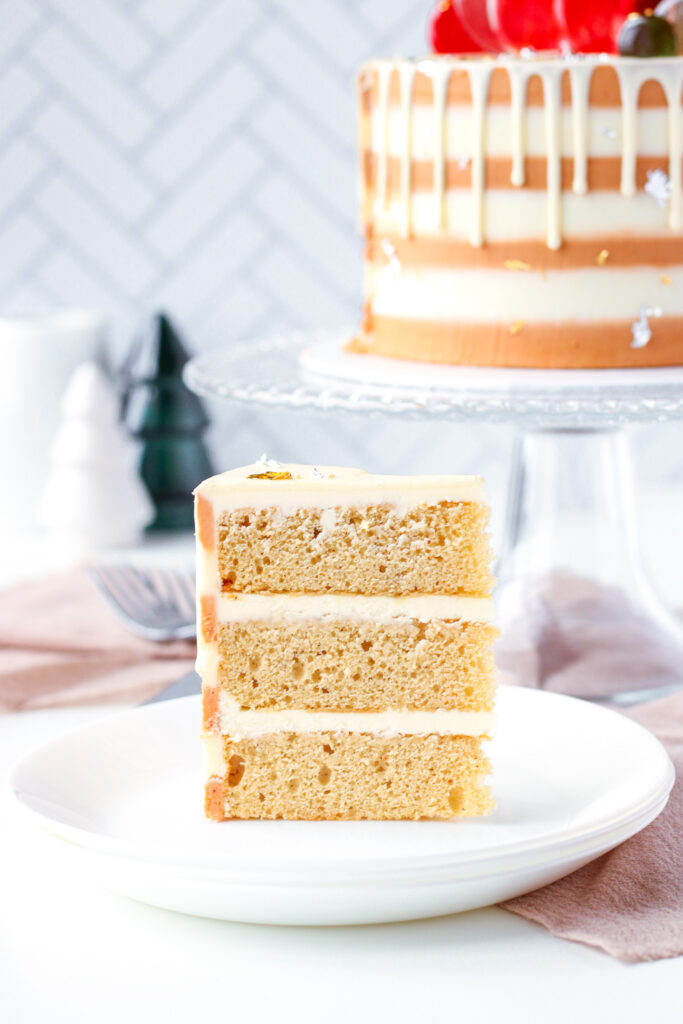
This recipe is very straight forward and uses the creaming method. The eggnog must be room temperature, otherwise your mixture will curdle and give you a very rough texture. I suggest microwaving it until just warm. Besides that, just be careful not to over mix and you’ll be fine!
Rum Frosting
Let’s be honest. If you’re an adult, eggnog usually involves a bit of rum. Naturally, I had to add that little element. For this eggnog cake, I decided to throw the rum into the frosting. Feel free to adjust the amount of rum and eggnog in the buttercream. This one is up to you.
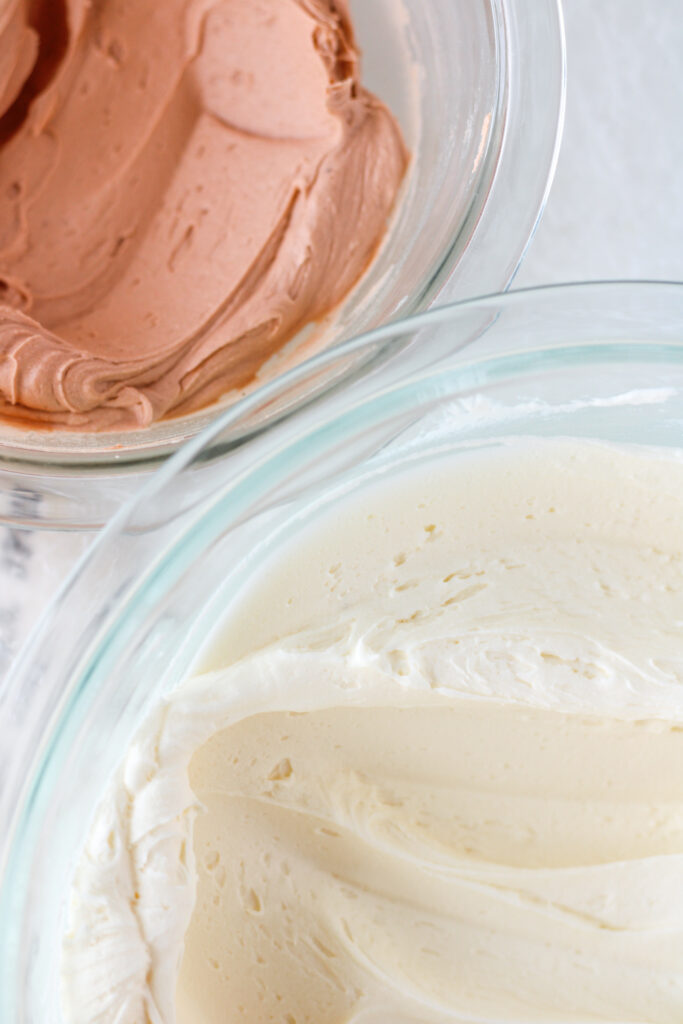
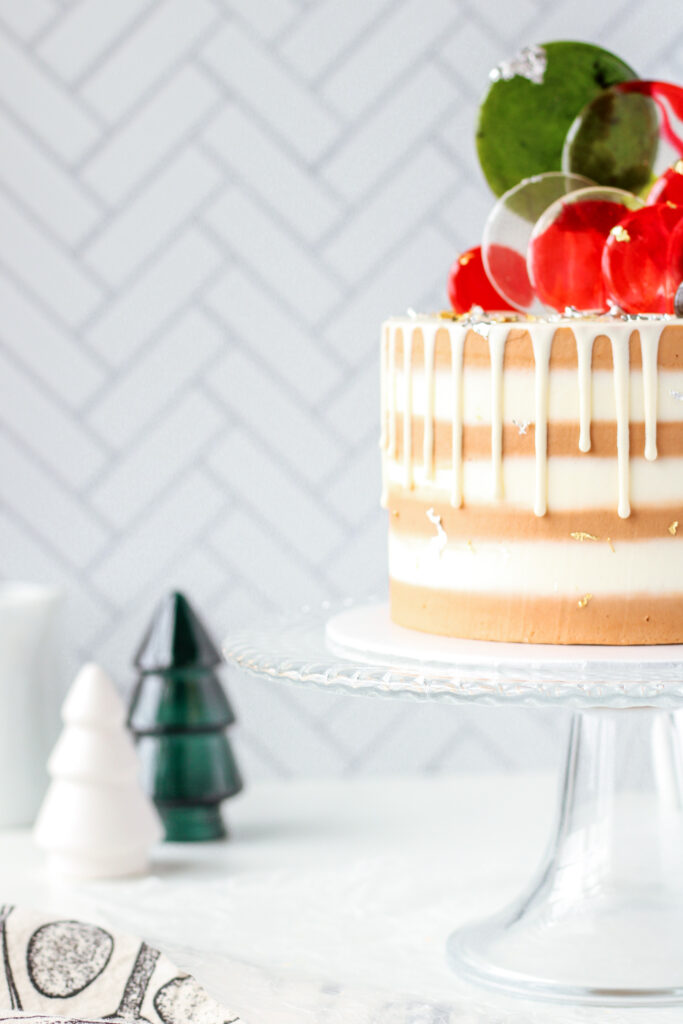
But I needed to make stripes and it just felt weird to color this frosting with bright holiday colors. Instead, I used some of my rum frosting and added cinnamon, nutmeg, and brown food gel to create stripes of spiced rum frosting. I loved that stripes not only fit the eggnog cake theme, but they added a nice contrasting flavor.

Eggnog White Chocolate Drip
I absolutely adore drip cakes. First of all, they are great at hiding ugliness on top of the cake, and it’s a fun way to incorporate more flavor into the final cake. For an eggnog cake, I felt it just made sense to make a white chocolate ganache with eggnog instead of cream. You could absolutely just stick with cream, but I’m telling you, the eggnog was amazing.
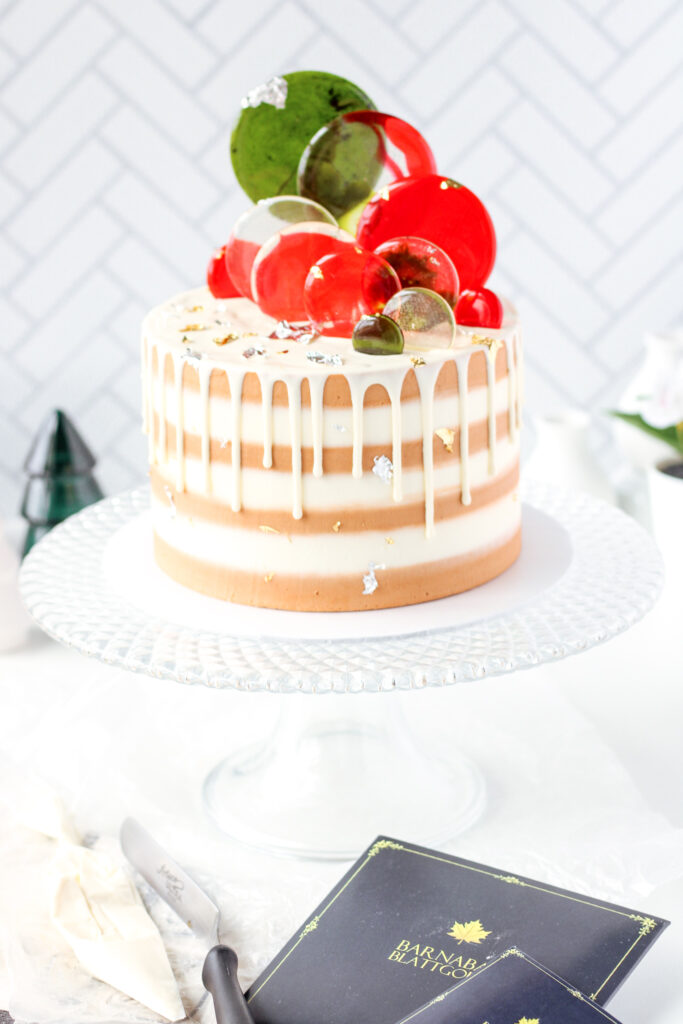
Since eggnog is so thick, this made the ganache super thick as well, which I prefer. Make sure to get your drip on the cake before the chocolate sets. After it’s all melted, stir until it is the perfect drip consistency, then go to town! I’ve found that my ganache is perfect for dripping around 90℉ – 99℉.
Related Reading: 10 Christmas Cookies to Make with Family
How to Make a Striped Cake
Stripes are fairly easy to make, but it did take longer than I expected. Fill, stack, and crumb coat your cake as usual. Once it is chilled, add a very thick top layer of the plain rum frosting to the sides of the cake. We’ll be adding the eggnog ganache, so you don’t need to add any more frosting to the top of the cake.
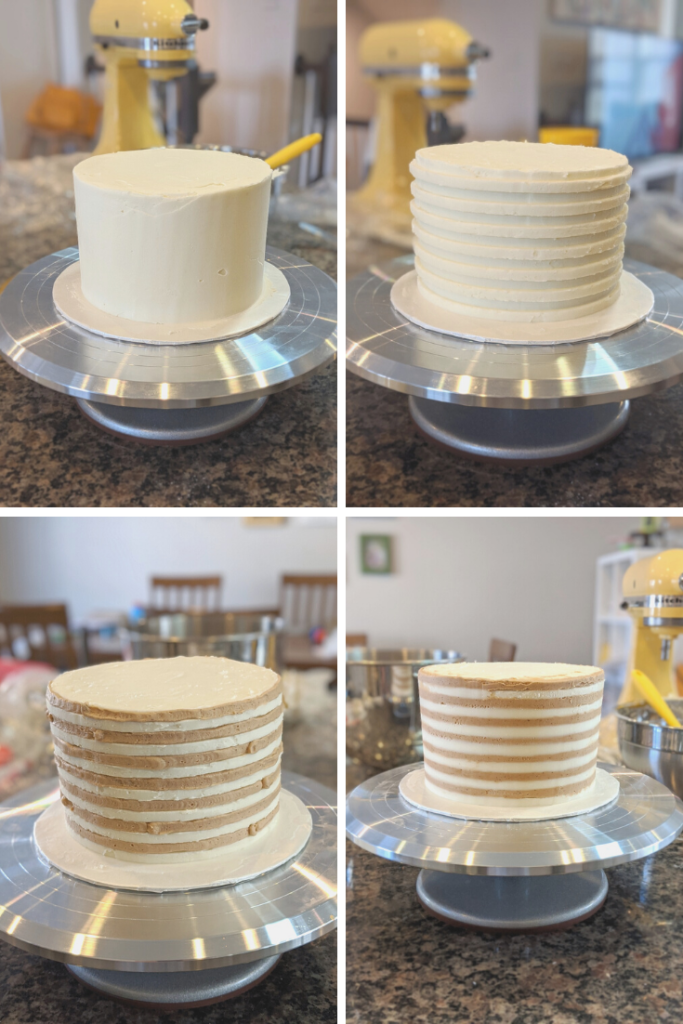
Smooth this top coat and fill in any air bubbles. It doesn’t need to be perfect. Now get ready to scrape for your life. Grab your striped cake comb and begin slowly scraping the stripes out. It’s best to go slow and wipe your scraper constantly.
If you don’t have a striped cake comb, that’s totes fine! You’ll just pipe your frosting in alternating rows. I did this with my shark cake and got some pretty sharp stripes. Ironically, I was aiming for an ombre effect…
And Scrape Some More…
After each round of scraping, fill in any bare spots or stripes with air pockets. Then, just scrape back over this area to create thick, smooth stripes. You want your stripes to be very deep because we’ll be scraping more in a bit. Once you’re satisfied, chill the cake for about 20 minutes.
Now fill in those stripes with the spiced rum frosting. Once all of the stripes are filled in, take your smooth scraper out and begin smoothing the sides. Each pass should take only a small amount of frosting off. After several passes, you should have clean stripes!

Blunders
This time around, I figured I’d use my cake comb and acrylic cake discs to get the perfect cake. Problem is, I also decided that I’d just pipe the stripes and not coat the whole cake first (besides a crumb coat).
Bad idea.
My stripes weren’t deep enough for my cake discs, so I had to pipe over my previous work and ended up with blurry stripes. Normally that would have really bummed me out, but when blunders happen, it’s really best to just go with the flow.
Making Isomalt Discs
I’m a bit extra, so striped frosting and an eggnog ganache drip just weren’t enough for me. My brain was focused on creating ornament cake decorations, but I ended up with something a bit different. These isomalt discs are easy to make and would be perfect for any cake theme. If you’ve never worked with isomalt before, read about how I made an isomalt sail for my Tequila Sunrise Cake to get the basics down.

Heat your isomalt and add some color and pearl dust. Now place several biscuit cutters on a silicone baking mat. Pour the isomalt into these circles and let them sit and firm up for about 15 minutes. The cutters just come right off and the discs pop off the mat easily. If the isomalt sticks at all, let it finish cooling.
Time to Decorate
To get a toothpick or lollipop stick on the back of the disc, melt more isomalt. Dip the stick in the slightly cooled sugar. Immediately place the stick on the back of the isomalt disc and gently press to adhere.
You can place these discs however you’d like on your cake. Any discs with toothpicks or lolipop sticks can be gently placed into the cake towards the back. To create depth, try placing some discs directly into the top of the cake. Check out my video tutorial for assembling and decorating this festive holiday cake!
Related Reading: Cranberry Ginger Bran Muffins
Enjoy!
My Eggnog Cake with Rum Frosting is the perfect cake to bring to parties this holiday season. The cake tastes just like a tall glass of eggnog with a dash of cinnamon and nutmeg. Meanwhile, the rum frosting adds a touch of holiday fun with the flavored stripes.
While you’re in the holiday baking spirit, be sure to subscribe to Bakes & Blunders. Not only will you get an email once a week with the latest blog post, you’ll get access to over a dozen baking and caking resources in my library! Some highlights include cake and holiday resources to make baking easier and less stressful. It’s all completely free for subscribers.
Eggnog Cake with Rum Frosting
Ingredients
Eggnog Cake
- 4 oz all- purpose flour
- 1.5 oz cake flour
- 1 1/4 tsps baking powder
- ½ tsp nutmeg
- ¼ tsp cinnamon
- 1/4 tsp salt
- 3.5 oz unsalted butter softened
- 3 oz light brown sugar
- 2 oz white sugar
- 1 Tbsp cake enhancer optional
- 2 eggs
- 1 tsp vanilla
- 4 fl oz eggnog room temperature
- 1 1/2 Tbsps canola oil
Rum Frosting
- 12 oz unsalted butter softened
- 24 oz powdered sugar sifted
- 2 Tbsps rum
- 1 Tbsp eggnog
- ½ tsp vanilla (optional)
- Pinch of salt
- Cinnamon and nutmeg
- Brown food gel
Eggnog White Chocolate Drip
- 3 oz white candy melts
- 1 oz eggnog
Instructions
Eggnog Cake
- Preheat the oven to 325°F. Spray three 6 inch cake pans with baking spray and line with parchment paper.
- In a medium bowl, sift together flours, baking powder, nutmeg, cinnamon, and salt. Whisk to combine. Set aside.
- In a stand mixer fitted with a paddle attachment, add the butter, sugars, and cake enhancer (if using). Beat on a medium speed until light and fluffy, about 5- 7 minutes. Scrape down the bowl.
- With the mixer on low, add eggs one at a time, letting each egg fully incorporate before the next addition. Add the vanilla and combine. Scrape the bowl down.
- Add ⅓ of the dry ingredients and mix on low until just combined. Now add ½ of the eggnog and beat on low until just combined. Repeat with another ⅓ of the dry ingredients and the remainder of the eggnog. Scrape the bowl down. Add the rest of the dry ingredients and beat only until just combined. Do not over mix.
- Divide the mixture evenly among the three pans. (About 7.5 oz for each pan.) Bake for 35- 40 minutes, or until the tops spring back and a skewer comes out clean. Cool in the pans for 10 minutes before inverting onto a cooling rack. Let cakes cool completely before assembling.
Rum Frosting
- Beat the butter in the bowl of a stand mixer for about 8- 10 minutes, or until pale and fluffy.
- Add about ⅓ of the powdered sugar and 1 tablespoon of rum. Beat on low to combine, then bump the speed up to a medium- low speed for a minute. Scrape the bowl down.
- Add another ⅓ of the powdered sugar and another tablespoon of rum. Beat on low to combine, then bump the speed up to a medium- low speed for a minute. Scrape the bowl down.
- Add the rest of the powdered sugar, the eggnog, a pinch of salt, and vanilla (if using). Beat on low to combine, then bump the speed up to a medium- low speed for a minute. Scrape the bowl down.
- Taste the frosting and adjust flavorings if necessary.
- To make the spiced rum frosting for stripes, mix a small amount of the rum frosting with cinnamon and nutmeg to taste. Add brown food gel until you've reached the desired color. I combined 8 oz of frosting with 2 drops of ivory and 2 drops of brown.
Eggnog White Chocolate Drip
- Place the candy melts and eggnog in a small microwave safe bowl. Microwave for 30 seconds and then stir.
- Microwave for 20 seconds and then stir until smooth. If it is still thick or lumpy, microwave in 5- 10 second bursts, stirring well afterwards. You could also heat this in a double boiler.
Notes
- Make this nonalcoholic by omitting the rum and adding more eggnog and/ or vanilla.
- This is a small cake, not my usual full sized 6 inch cake.
My Favorite Products for this Recipe

Colleen
Hi there! I’m Colleen, a novice baker with a passion for learning and improving my bakes… and blunders. On Bakes and Blunders, you can find all sorts of tasty recipes that range in difficulty, but most importantly, I’ll try to explain the reason behind important steps. If you know why a recipe works, you can tweak and adapt it to suit your unique tastes, and you’ll be able to reliably produce some very delicious treats. If you love baking and want to expand and grow your skills, or if you are a casual baker and just need some pointers, my blog is right up your alley! Join me on my baking journey and we’ll learn how to make more impressive recipes together.




8 Comments
Kim
Omg!! This looks AMAZING! I didn’t realize there was a technique to striping a cake. I love it!
Colleen
It’s pretty easy too! There are actually several different ways to do it. Who knew?
Angela Greven | Mean Green Chef
Another beautiful cake by Bakes and Blunders! I would LOVE a slice of this right now with a cup of coffee, egg nog has been a favorite of mine since my Gran made it every holiday. Make a cake out of that and I’m in heaven. Your layering is perfect and this is sure to be a show stopper on any table!
Colleen
You would love this cake! I was shocked with how much eggnog flavor the final cake has.
Kay
Your such an inspiration the time and devotion you gove to your work. True artistry! This looks awesome. Well done and thanks for sharing another fantastic creation.
Colleen
Thank you! It was a pretty easy look to create.
Erika
What a delicious cake idea. Your layers are perfection!
Colleen
Thanks! I love how the cake came out!