

How to Frost a Cake Using Acrylic Cake Discs


When you start your cake journey, it’s just exciting to make a tasty cake and creamy buttercream from scratch. But soon, it becomes just as important to nail those sharp edges on your homemade cake. While it’s totes possible to do this with just a scraper and some patience, acrylic cake discs make the process quicker and easier!
This page contains affiliate links which means I may earn a commission as an Amazon Associate (or other affiliate program) from qualifying purchases. I only recommend products that I use and trust.
Do Acrylic Cake Discs Really Make A Difference?
To be honest, I was so excited to use them that first time and ended up being pretty disappointed. Turns out, I just needed to change my technique. The second time I used these acrylic cake discs, I got perfect, sharp edges!

Now I can do my final coat or frosting in less than 20 minutes and my cakes come out way better than they ever did before. My cakes have straight sides with sharp edges and I don’t have to spend an entire afternoon laboring in the kitchen.
How to Use Acrylic Cake Discs
Okay, I get it. You’re interested and you want the deets. Luckily for you, I’ve got a video and step by step instructions to walk you through the entire process. Let’s dive in!
Supplies

1. Wrap the cake discs in Press’n Seal.
This will make removing the discs soooo much easier. I did not do this the first time and it has made a huge difference. It will leave a slight textured look on the top of the cake, but if that bothers you, lightly go over the area with a warm scraper after you take the discs off.
2. Stack and crumb coat your cake.
Place a cake board on your turntable, then fill, stack, and crumb coat your cake. To prevent it from shifting around, I suggest placing a piece of grippy mat between the turntable and the disc.

I always put a cake board under my cake. Not only will this make your cake more stable, it will also make removing the bottom acrylic cake disc a breeze.
3. Chill your crumb coated cake until firm.
Place the cake in the fridge for about 15- 20 minutes or until the crumb coat is firm. I usually just place my entire turntable with the cake into my fridge. Once firm, transfer the crumb coated cake onto an acrylic cake disc, covered side facing up. It helps to smear a thin layer of frosting onto the disc first so that the cake doesn’t shift around too much.
Related Reading: Cake Tools Every Home Baker Needs
4. Level and top the cake with your final cake disc.
Add a generous dollop of frosting to the top of your chilled cake and use your palette knife to smooth it into a level coating. Try your best to get the frosting to hang over the edge of the cake.
Carefully, place the final cake disc covered side down onto the top of the cake. Use one or two cake scrapers to make sure the two discs line up. Work your way around the cake and press the scraper to the discs and make sure they meet. I like to then take a scraper on each side of the cake and double check everything is in order.

Place your level on top. If the bubble isn’t centered, push down on the top of the disc until your cake is level. This is essential in order to get perfectly straight sides. Then triple check that the two acrylic discs are lined up.
5. Add your final coat of buttercream to your cake.
Start at the top cake disc and work your way around to add frosting to the top edge of the cake. It helps to lightly place your hand on the top disc so that it doesn’t budge. Now you can apply frosting to the entire cake with your spatula or a piping bag.

Smooth the sides of the cake with a bench scraper. Make sure the scraper touches both cake discs. After a swipe, go back and fill in any holes with more frosting. Repeat until the cake has smooth, straight sides. I like to heat my metal scraper with hot water or a torch for the final few passes to get a super smooth look.

6. Chill the cake until super duper firm.
Place the cake (and the turntable if you’re me) in the fridge to chill for about an hour. You want the cake to be super duper firm because we’re about to get flippy and we don’t want those straight sides and sharp edges to go to waste.
7. Remove the discs and place onto your cake stand.
Have your decorated cake board or pretty cake stand on hand for this step. Carefully remove the cake from your turntable and flip it upside down onto the turntable. Gently peel the plastic wrap off of the cake disc. Then work your way around the cake to use the plastic to carefully pull the disc off of the bottom of the cake.
Add a thin smear of frosting to the bottom of the cake board and grab your decorated cake board or cake stand. Place it on the bottom of the cake and do your best to make sure it is centered. Carefully flip the cake back over so that it is right side up.
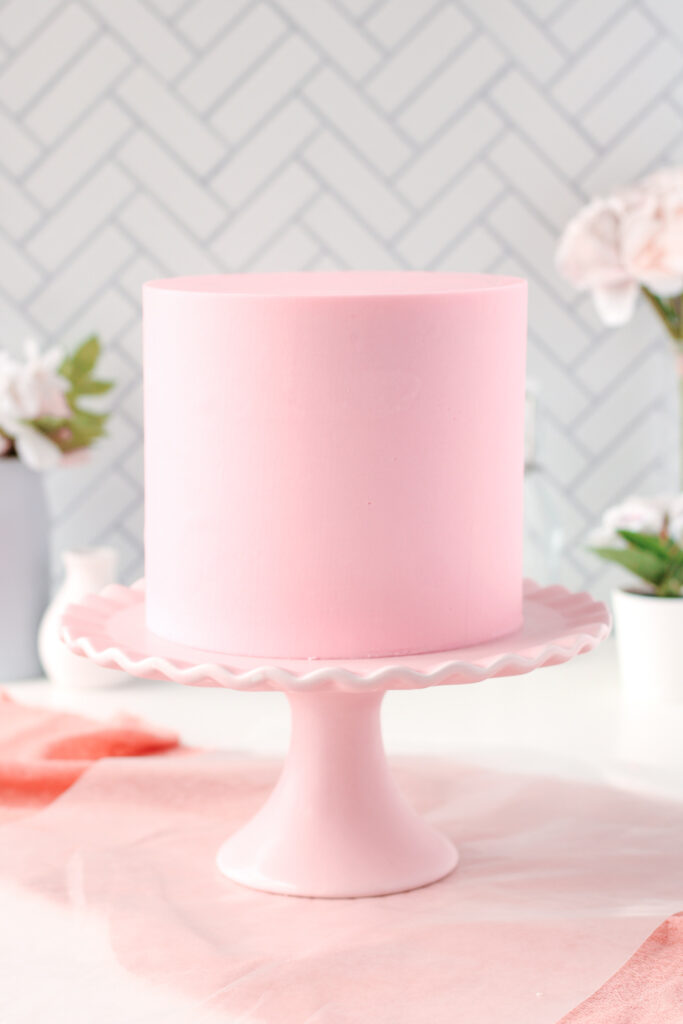
Now you can do the same process to remove the top acrylic cake disc. This side will not be as easy because it’s all frosting and no cake board. Be patient and you’ll get it. If the frosting seems to be becoming soft at any point, place it back in the fridge for 20 minutes.
8. Tidy up and decorate your cake.
I like to use the small palette knife from this set to patch up and smooth over any small areas on top of the cake that need tending to. Once you’re happy with the top of the cake, you can decorate however you like!
Tips & Tricks For Using Acrylic Cake Discs
- To get your cake centered on the final cake board, I like to lightly trace the cake board that goes under my cake in step 2 onto the tissue paper before I cover it. When centering it onto the bottom of the cake, you just have to make sure the circle isn’t visible!
- If your discs aren’t perfectly even, your cake will have tilted sides, so take an extra minute to make sure it’s all lined up.
- If you can’t get a disc off, use a thin palette knife to help loosen it up. Very carefully slide it under the disc and slide it around to pop off the disc.
- Watch the step by step video on the Bakes & Blunders YouTube channel to see exactly how I use acrylic cake discs to get straight sides and sharp edges.
- Always level your cake layers before stacking.
Related Reading: How to Make a Custom Cake Board
What Size Cake Disc Should I Use?

Acrylic cake discs generally come in quarter inch increments. For these 6 inch cakes, I use a 6.25 inch disc from Cakesafe, but you can also find them on Amazon. I love this amount of frosting for cakes, but if you want a thick layer, go for the next size up (6.5” in my case).
That’s All Folks!
Using acrylic cake discs on your round cakes is a very easy technique to get that professional finish to your cakes. My favorite part about them is how much time I save! I cannot recommend these handy discs enough. Give them a whirl and let me know what you think.

And if you’re serious about improving your cakes, check out my Baking Resource Library. It’s full of tools like a mini piping tip catalog and a cake template that can help you improve your cakes. The library is completely free to all of my email subscribers, so sign up here if you want access.
Happy Caking!

Colleen
Hi there! I’m Colleen, a novice baker with a passion for learning and improving my bakes… and blunders. On Bakes and Blunders, you can find all sorts of tasty recipes that range in difficulty, but most importantly, I’ll try to explain the reason behind important steps. If you know why a recipe works, you can tweak and adapt it to suit your unique tastes, and you’ll be able to reliably produce some very delicious treats. If you love baking and want to expand and grow your skills, or if you are a casual baker and just need some pointers, my blog is right up your alley! Join me on my baking journey and we’ll learn how to make more impressive recipes together.





4 Comments
Linda Kraner
How to use this for 14 inch cakes? You can’t use press n seal as it only goes to almost 12. Inches in diameter? What do I use for cakes 12 inches and up cakes
Colleen
I have never made a 12 or 14 inch cake, but if you have cake discs that big, this technique should still work. I would simply use two sheets of the press n seal. Overlap them and they will stick to each other pretty well, then add your disc and trim the excess press n seal as normal.
Dominique
Can you use them and also use cake dowels? if so how?
Colleen
You should be able to. If necessary, you can add dowels before frosting the cake, or you can add the towels after the cake is frosted when you are stacking your tiers. I don’t do tiered cakes often, but you should be able to use your normal doweling method with cake discs. The discs just help with frosting the cakes, then you take them off. Hope that helps!