

How to Use Edible Sugar Sheets


Wouldn’t it be nice to create intricate works of art on a cake without all of the hassle of actually being an artist? Luckily you can! Nowadays, it’s super easy to buy gorgeous prints of edible sugar sheets to cover a cake or just add a few details. Let me tell you about my first time playing with one of these lovely prints.
This page contains affiliate links which means I may earn a commission as an Amazon Associate (or other affiliate program) from qualifying purchases. I only recommend products that I use and trust.
Jump to Recipe
Granary Kitchen
I love beautifully decorated cakes, but I’m not much of an artist. While I can swirl colors and make edible flowers, I could never draw intricate designs. But, with edible sugar sheets, you don’t have to!

Granary Kitchen was kind enough to send me some pretty, edible sugar sheets just to see what I could do. So, here is my very first attempt at working with this stuff. I had no idea what I was doing, but even still, I think this little cake turned out pretty nice.
What Are Printed Edible Sugar Sheets?
These handy decorating accessories are sheets of edible paper printed with edible ink. They come in nearly every pattern or design you can think of. You can eat the sheet on your cake or easily peel it off before chowing down. Ben loved eating my scraps. I ate some and it’s sweet, soft, and not a bad addition!

Unlike wafer paper, these sugar sheets are thick and easily bendable. If left out in the open air, they will harden, so be sure to keep them in an airtight wrapper and out of direct sunlight so that they don’t fade. Once I added the sugar sheet to the cake, it never did harden completely, but in a drier environment, I imagine it would.
Print Recipe
Applying Printed Sugar Sheets to a Cake
Here’s my quick video tutorial that will show you how to add a beautiful printed sugar sheet to your cake. I’m using a 2 layer 6 inch cake, but the technique will be the same with any sized cake.
I have never worked with sugar sheets before, so I really didn’t know how to pull off this pretty cake design. Luckily, they are pretty easy to work with. Here are my best tips and tricks to make your first time a success.
Cutting
I tried using a pizza wheel first, but I didn’t have great control over it, so I switched to a sharp craft knife. That worked great! And when I needed to trim the sheet once it was on my cake, scissors worked perfectly.
Straight Sides
The most important thing you can do before applying your sugar sheet is make sure your cake has perfectly straight sides. This was trickier than I realized. If the sides are not perfectly straight, the sugar sheet will go on a bit crooked. If that happens, peel back the sugar sheet and scrape again so that the side is straight.
Related Reading: How to Make Simple Wafer Paper Rose
Tacky Cake
No, I’m not insulting your cake. Sugar sheets are not sticky. So in order to apply them to your cake, it must be tacky. With a buttercream cake, I suggest chilling the cake until slightly firm, but the surface hasn’t set. If your frosting is firm enough, you may not need to chill.

If you are applying to a fondant cake, you’ll need to add some moisture. Brush a thin layer of piping gel or shortening over the surface before adding the sugar sheet. But be careful! Excess water could cause the ink to bleed.
Jump to Recipe
Next Time
My husband always says that I’m my own worst critic. He’s not wrong, but there’s also a difference between disparaging your work and learning what you could do better next time. So, to be clear, I think this cake is adorable! But, I would also make a few minor changes.

The biggest change I would make is the frosting color. I really wish I had done a lighter pink. It would have looked better, but I also think it would have hidden my little mistakes better too. Having a bright frosting behind the sugar sheet will show any gaps, so keep that in mind.
Jump to Recipe
I also think it would have been fun if I had left the edge of the sugar sheet above the cake, but given it a jagged look. Then I could trim the edge with gold paint. That’s just another idea, not something that I think needs to be done. There are so many different looks you can create.
Wafer Paper Flowers
I just adore wafer paper flowers. They are easy to make, last a long time, and look so beautiful. I topped this cake with a large wafer paper ranunculus and two small ones. They kind of matched the pink flowers on the print. Check out my wafer paper ranunculus tutorial to make your own.
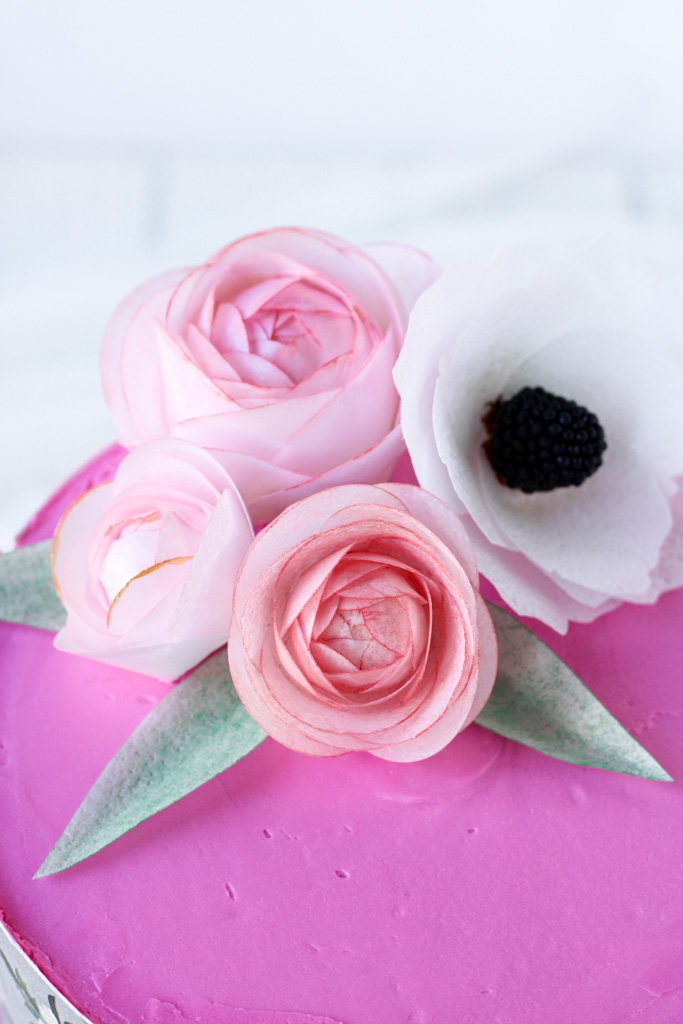
And I also got to try a new flower! This is the wafer paper fantasy flower by Anna Astashkina. She is a crazy talented cake artist who specializes in wafer paper. This flower was insanely simple and uses a Haribo berry as the center!
Chocolate Cherry Cake
I had no intention of including a recipe in this post, but here we are. This is the vegan chocolate cupcake recipe baked in two 6 inch cake pans. Once they were cooled and chilled, I leveled them and brushed them with cherry syrup.

The frosting is a cherry easy buttercream. I added several tablespoons of cherry syrup to the frosting to give it a bright cherry flavor. In between the layers, I also added some of the cherries that came in the syrup. (I got a little jar of cherries from Trader Joe’s and I love them!)
Enjoy!
Make sure to check out all of the gorgeous designs of sugar sheets available from Granary Kitchen. Which one do you love the most? I’ve still got some more to use, so if there’s another tutorial you’d like to see with these sugar sheets, leave a comment below. Thanks for being here, friend!
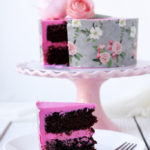
Chocolate & Cherry Cake
Ingredients
Chocolate Cake
- 1 cup all- purpose flour 4.5 oz
- 1/2 cup cake flour 2 oz
- 1 cup sugar 7 oz
- 1 tsp baking soda
- 1/2 tsp salt
- 3 Tbsps cocoa powder .5 oz
- 1 cup hot black coffee
- 1 tsp white vinegar
- 1 tsp vanilla
- 5 Tbsps canola oil 2 oz
- Cherry syrup for brushing
Cherry Easy Buttercream
- 2 oz pasteurized egg whites
- 10 oz powdered sugar sifted
- 8 oz unsalted butter room temperature
- 2- 4 Tbsps cherry syrup
- 1/4 tsp vanilla
- Pinch of salt
- Pink food gel
- Cherries for filling
Instructions
Chocolate Cake
- Preheat oven to 350℉. Spray two 6 inch cake pans with Baker's Joy and line with parchment paper. Set aside.
- Sift flours, sugar, baking soda, and salt into a medium or large bowl. Set aside.
- Sift cocoa powder into a medium bowl and add hot coffee. Stir until combined. Add vinegar, vanilla, and oil and stir again until combined.
- Pour the chocolate mixture into the bowl of dry ingredients. Gently stir until combined.
- Divide the batter equally between the two cake pans. Bake for 30- 35 minutes, or until the tops spring back when touched.
- Cool in the pan for 10 minutes before removing to a cooling rack. Allow cakes to cool completely before frosting.
Cherry Easy Buttercream
- Place the pasteurized egg whites and powdered sugar in the bowl of your stand mixer fitted with a balloon whisk. Whip on high for 5 minutes.
- Turn the speed down to medium and add the butter one tablespoon at a time. Then bump the speed back up to medium- high and whip for 8 minutes.
- Add the cherry syrup, vanilla, salt, and food gel and beat until combined. Scrape the bowl down and beat again.
Assemble
- Level your cake layers and place one on a cake board with a smear of frosting. Add a layer of frosting and top with cherries.
- Add the next cake layer and cover the whole cake in a thin layer of frosting. Place the cake in the fridge and chill until firm.
- Add a final layer of frosting and smooth. Apply your edible sugar sheet and top with any decorations. Enjoy!
Notes
- I used cherries and syrup from a jar of cherries that I got at Trader Joe's. Cherry pie filling might work, but I don't know.
My Favorite Products for This Recipe & Tutorial

Colleen
Hi there! I’m Colleen, a novice baker with a passion for learning and improving my bakes… and blunders. On Bakes and Blunders, you can find all sorts of tasty recipes that range in difficulty, but most importantly, I’ll try to explain the reason behind important steps. If you know why a recipe works, you can tweak and adapt it to suit your unique tastes, and you’ll be able to reliably produce some very delicious treats. If you love baking and want to expand and grow your skills, or if you are a casual baker and just need some pointers, my blog is right up your alley! Join me on my baking journey and we’ll learn how to make more impressive recipes together.


2 Comments
Elle
I love that you’re a novice baker, and this is a great project. I thought I’d kick in an observation as a mathematician of sorts. It’s not just that the side needs to be straight. If you want the sugar sheet to wrap the side of the cake exactly, the side needs to be perpendicular to the base. That is, the side needs to form a 90-degree angle with the surface on which the cake sits, so that it is straight up-and-down. Otherwise, when you wrap the sugar sheet, the bottom edge won’t meet the bottom edge of the cake all the way around. If the side leans outward from base to top, you’ll get gaps where the sugar sheet is higher than the base. If the side leans inward, there will be excess sugar sheet where the cake meets the surface. If it leans outward in some places and inward in others, you’ll see both problems.
Colleen
You are 100% correct! Well put 😀