

Chocolate Coffee Dome Entremet


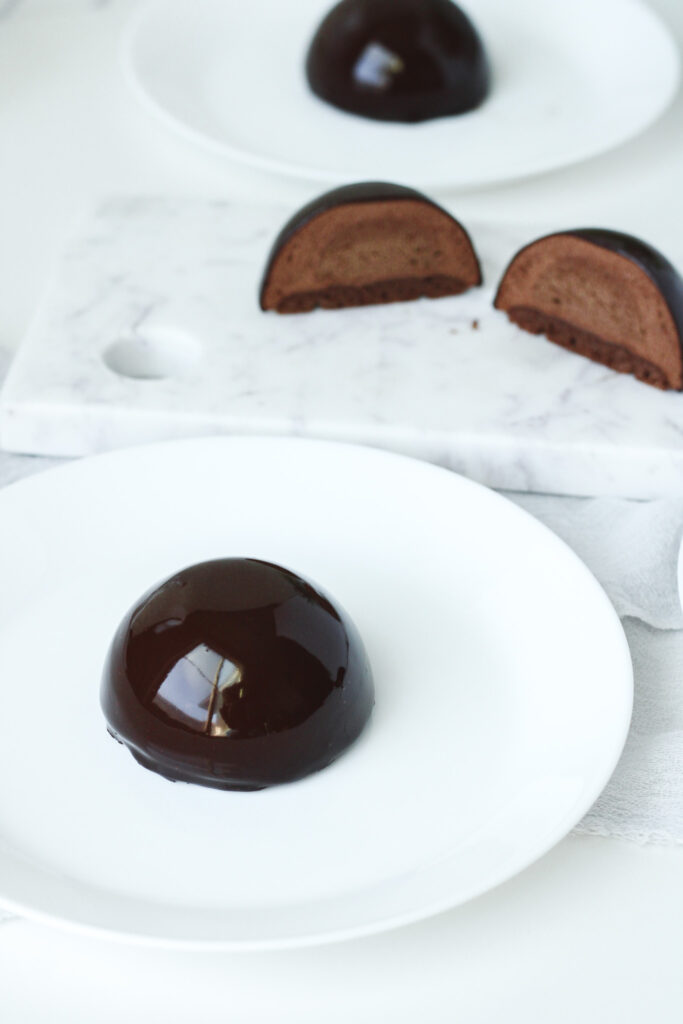
These chocolate coffee dome entremets are rich and elegant. The chocolate dacquoise base is topped with a coffee cremeux covered in chocolate mousse. Then it is covered in a thin chocolate mirror glaze. Let’s dive into the recipe and tutorial!
This page contains affiliate links which means I may earn a commission as an Amazon Associate (or other affiliate program) from qualifying purchases. I only recommend products that I use and trust.
This post was originally published on February 29, 2024. It was republished on February 5, 2026 with updates.
Update
The first time I made these chocolate coffee dome entremets I had purchased a baking kit with the recipe and ingredients. It was so much fun, but unfortunately the company went out of business. I decided I should share the recipe and what I learned with y’all!
If you enjoy this recipe, check out my pistachio, rose, and strawberry tartlets. It was another baking kit from the same company. It’s a gorgeous dessert and a great recipe for tackling pastry.

Chocolate Coffee Dome Entremet
Chocolate and coffee are two of my favorite flavors for desserts, so I was wildly excited to try my hand at this entremet. Besides that, I was excited to make cremeux and dacquoise for the first time. This was also my first time making an entremet, though the mousse stone in the tartlet kit was similar.
Be sure to check out the step by step recipe tutorial for these entremets. There’s also a quick YouTube short from when I made these back in 2024.
Day One
Step 1: Coffee Cremeux
The finished coffee cremeux is similar to a ganache, but much thicker and richer. On its own, the coffee flavor was very strong and not too sweet. I was able to fill up my entire mold and then had some extra that I poured into a tupperware and kept in the fridge.

I made these cremeux inserts a day before doing steps 2 and 3. Once they were frozen, I placed a bit of wax paper over the mold, then wrapped the mold (and tray it was on) in cling wrap. Since they were only sitting in the freezer overnight, they probably would’ve been fine without wrapping them, but I didn’t want to risk it.
Day Two
Step 2: Chocolate Dacquoise Base
From making macarons on the reg, I have a habit of wiping my bowl and whisk with a bit of vinegar before I make any meringue. It takes two seconds and can get rid of any fat residue that could prevent your meringue from whipping up.

I prefer to whip my egg whites on a 4/6 speed because slow and steady makes a sturdier meringue. Folding the dry ingredients into the meringue was similar to macaronage, except much more gentle because you don’t want the mixture to be runny at all.
Related Reading: Salted Caramel Cheesecake Entremets
Baking the Dacquoise
I was able to pipe 28- 30 chocolate dacquoise bases and picked out my best looking ones for the entremets. The others got layered between wax paper in an air tight container. They are crisp with a chewy interior.
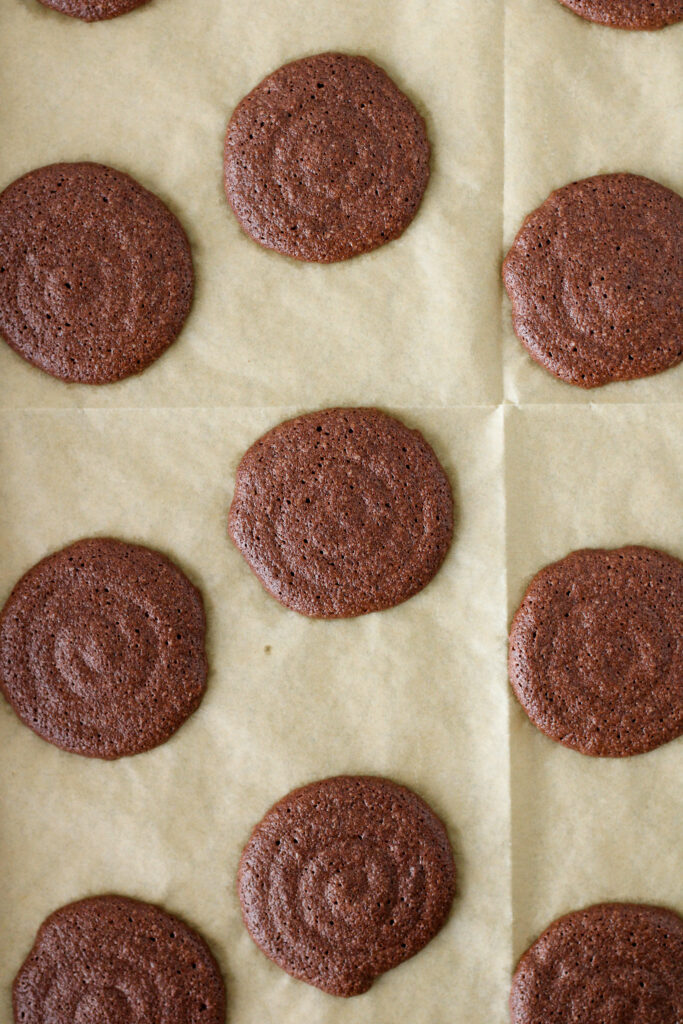
While I baked mine according to the recipe, I feel like I should have erred on the lower side (15 minutes) instead of doing 18 minutes. The edges should be set and the center should not look wet anymore.
Step 3: Chocolate Mousse
My chocolate mixture for the mousse just did not want to melt and it was quite lumpy. A few lumps are no biggie, we’re sieving it anyways, but this was too much. I popped my mixture (before whipping the cream) in the microwave a few times for 5- 10 second bursts, stirring well after each. It was thicc, but no longer lumpy. An immersion blender also really helps eliminate lumps.
After folding the chocolate creme anglaise into the whipped cream, I did have some chocolate streaks, but that’s no biggie. You definitely don’t want to deflate all that glorious air! Store the leftover egg whites for later and make macarons or mini pavlovas.
Dome Assembly
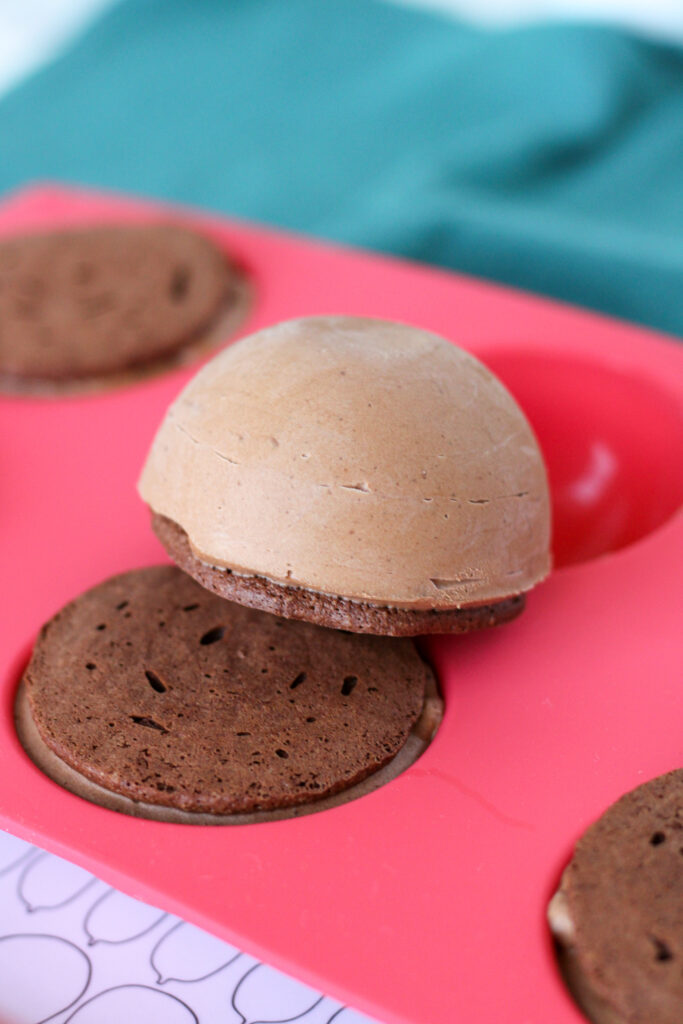
My molds came from a Target chocolate bomb kit that I bought years ago. You’ll need to pipe in some chocolate mousse, gently press in a coffee cremeux dome, then add more mousse, and top it off with a dacquoise base.

I urge you not to overfill the molds, but it is not the end of the world if the dacquoise base ends up above the edge of the mold. I was able to assemble 12 chocolate coffee dome entremets. I still had some leftover mousse, but not much.
Day Three
Step 4: Mirror Glaze
I did my first mirror glaze with the tartlet baking kit. It wasn’t awful, but I knew I could do better. However, this glaze does not use condensed milk and solid chocolate, it uses cocoa powder for that rich flavor and color. But it also made my glaze hecka lumpy.

Assuming my sieve would catch all the lumps, I did not use an immersion blender. Boy howdy, I really should have. Even after sieving the glaze multiple times, my finished chocolate coffee dome entremets had some itsy bitsy lumps. Not ruined, but irksome to me. This time around, I did use an immersion blender and strained the glaze twice.
Application
Last time, my glaze was too warm, which meant I ended up adding a ton of layers to get it too stick to the mousse. This time, I made sure to wait (and it seemed to take forever) until the internal temperature of the glaze was at the appropriate range.

This made a huge difference! After glazing the first round of entremets, the glaze was getting a bit too thick. Literally 4 seconds in the microwave, and it was back to perfect drizzling consistency.
Related Reading: Chocolate Caramel Macarons
Happy Baking!
Y’all, the creamy combination of chocolate mousse with that rich coffee cremeux filling was insanely delicious! The chocolate dacquoise base was sturdy, but tender after the mousse had time to soften it up. And that glaze was so shiny, I could basically use it as an actual mirror.

This recipe creates an impressive looking dessert, but it’s not overly complex. I think it’s a great choice for a home baker looking to refine their baking skills. It’s also super easy to break the work up and take a few days to tackle the project.

Chocolate Coffee Dome Entremets
Ingredients
Coffee Cremeux
- 12 g cold water
- 3 g unflavored gelatin 1 tsp
- 200 g heavy cream
- 1 tsp espresso powder
- 3 egg yolks
- 20 g sugar
- 75 g dark chocolate finely chopped
Chocolate Dacquoise Base
- 100 g almond flour
- 100 g sugar divided
- 25 g cocoa powder
- 15 g cornstarch
- 3 egg whites
- 45 g unsalted butter melted
Chocolate Mousse
- 12 g cold water
- 3 g unflavored gelatin 1 tsp
- 225 g heavy cream divided
- 75 g whole milk
- 3 egg yolks
- 15 g sugar
- 150 g dark chocolate finely chopped
Chocolate Mirror Glaze
- 80 g cold water
- 15 g gelatin
- 250 g sugar
- 150 g heavy cream
- 100 g water
- 95 g cocoa powder sifted
Instructions
Coffee Cremeux
- Place a 1.5" demi sphere silicone mold on a flat tray and make sure there is a flat surface available in your freezer. Set the this aside for later.
- Combine the cold water and gelatin in a small bowl and set aside to bloom.
- In a small saucepan, heat the cream until it is simmering. Remove from heat and mix in the espresso powder.
- In a heat proof bowl, quickly whisk together the egg yolks and sugar until well combined. Slowly pour the coffee cream mixture into the egg yolks, stirring constantly. Add a little cream at a time until all of it has been combined with the yolks.
- Transfer the mixture back to the saucepan and place over low- med heat. Stir constantly until the custard has thickened enough to coat the back of a spoon.
- Place the chocolate and bloomed gelatin in a clean heat proof bowl. Pour the hot custard through a sieve and into the same bowl. Let the hot custard warm up the chocolate for about 30 seconds, then stir until smooth. If needed, use an immersion blender to emulsify the cremeux and remove and small chunks.
- Using a piping bag or a measuring cup with a spout, carefully pour the cremeux into the prepared mold. Transfer to the freezer and let the cremeux inserts freeze for at least 2 hours, but preferably overnight.
Chocolate Dacquoise Base
- Preheat the oven to 350℉. Use a template or 2" round cutter to trace circles on the back of a sheet of parchment. Allow 1- 2 inches between circles, the dacquoise will spread a tiny bit. Place the parchment on a baking sheet and set aside.
- Sift together almond flour, 50g of sugar, cocoa powder, and cornstarch. Whisk to combine. Set aside.
- Place the egg whites in the bowl of a stand mixer and whip on a med- low speed for about 30 seconds, or until the whites start to bubble and foam slightly. Slowly and gently drizzle in the remaining 50g of sugar. Whip the meringue on a medium speed until you have stiff peaks.
- Add the dry ingredients to the meringue and gently fold together until there are no streaks of dry ingredients. Try not to knock out too much air.
- Take a spoonful of the mixture and combine with the melted and cooled butter in a small bowl. Stir until smooth. Add this back into the mixing bowl. Carefully fold until the butter is incorporated.
- Transfer the batter to a large piping bag. You can use a small round tip (like a 12) or just snip the end of the bag off. Pipe the batter in a swirl to fill all of the circles you've traced onto the parchment paper (make sure the pencil side of the paper is facing the pan).
- Bake the dacquoise for 15- 17 minutes. The edges should be set and the centers should not look wet.
- Cool on the baking tray for 10- 15 minutes before transferring to a wire rack. Immediately begin on the chocolate mousse.
Chocolate Mousse
- Place a 2.5" demi sphere silicone mold on a flat tray. Set this aside.
- Combine the cold water and gelatin and set aside to bloom.
- Place 75g of the heavy cream and the whole milk in a small saucepan. Bring to a simmer over medium heat.
- In a heatproof bowl, whisk together the egg yolks and sugar until combined. Slowly pour the hot cream into the yolks, stirring constantly. Add a little at a time until it has all been incoporated.
- Transfer the mixture back to the saucepan and place over low- med heat. Stir constantly until the custard has thickened enough to coat the back of a spoon.
- Place the chocolate and bloomed gelatin in a clean heat proof bowl. Pour the hot custard through a sieve and into the same bowl. Let the hot custard warm up the chocolate for about 30 seconds, then stir until smooth. If needed, use an immersion blender to emulsify and remove and small chunks. Set aside.
- In a clean bowl, whip the remaining 150g of heavy cream to soft peaks. Stir a spoonful of the whipped cream into the thick chocolate mixture to loosen it up a bit. Gently fold the remining whipped cream into the chocolate mixture until just combined.
- Transfer the chocolate mousse to a large piping bag. No piping tip needed, we will be cutting the tip off.
Dome Assembly
- Cut the bottom ½" off the tip of the piping bag. Pipe mousse halfway up the mold.
- Take a frozen coffee cremeux insert out of the freezer and press it into the mousse with the flat bottom facing up. Pipe another thin layer of mousse on top, leaving a space for the base.
- Gently press a chocolate dacquoise base into the mousse. Repeat with the remaining cavities.
- Place in the freezer until set, at least 2 hours, but preferably overnight.
Chocolate Mirror Glaze
- Combine the cold water and gelatin in a small bowl and set aside to bloom.
- In a saucepan, combine the sugar, heavy cream, and water. Place over medium heat and bring to a boil.
- Place the sifted cocoa powder in a heat proof bowl. Add the hot liquid in 3 additions, whisking well after each until smooth.
- Add the bloomed gelatin to the hot cocoa liquid and stir until smooth. It can help to break up the gelatin into smaller chunks.
- Use an immersion blender to minimize any chunks of cocoa or gelatin, then sieve into a tall measuring cup with a spout. Leave the glaze to cool until it reaches 90- 93℉.
- When ready, place a frozen mousse dome on a small upturned bowl or shot glass. Pour the glaze onto the dome by starting in the center and working your way to the edges in a spiral.
- Allow the excess glaze to drip for a bit, then remove the set excess glaze with a small offset spatula. Use two small offset spatulas to transfer the glazed dome to a serving plate or round.
- As the glaze cools, you will need to reheat it in the microwave in 5 second bursts until it is in the proper temperature range.
- Allow the entremets to thaw at room temperature for about 30 minutes before serving.
Notes
- You'll be able to pipe about 28- 30 dacquoise bases. Any extras can be stored in an air tight container and enjoyed as cookies.
- There is more than enough glaze for all 12 entremets. If you run out of the glaze in your pouring cup, scoop up the congealed glaze from previous pours and remelt.

Colleen
Hi there! I’m Colleen, a novice baker with a passion for learning and improving my bakes… and blunders. On Bakes and Blunders, you can find all sorts of tasty recipes that range in difficulty, but most importantly, I’ll try to explain the reason behind important steps. If you know why a recipe works, you can tweak and adapt it to suit your unique tastes, and you’ll be able to reliably produce some very delicious treats. If you love baking and want to expand and grow your skills, or if you are a casual baker and just need some pointers, my blog is right up your alley! Join me on my baking journey and we’ll learn how to make more impressive recipes together.


2 Comments
Jennifer
Thank you for a great post! I would really like to make these, but unfortunately the company is no longer in business. Any chance you could share the recipes to this beautiful dessert with me? Thank you!
Colleen
I was so bummed when I saw they closed just recently! I will try to get the recipe typed up at some point and add it to this post.