

Gingerbread Marshmallow Bites


Gingerbread marshmallow bites pair a soft gingerbread cookie with molasses marshmallow all encased inside a thin chocolate shell. These little treats look gorgeous and taste incredible! Let’s talk about how to make these soft, lightly spiced marshmallow bites.
This page contains affiliate links which means I may earn a commission as an Amazon Associate (or other affiliate program) from qualifying purchases. I only recommend products that I use and trust.
Marshmallow Inspiration
My very first marshmallow bite creation were these strawberry lemonade marshmallow bites. They came out pretty dang cute and tasted great, but I knew I could do better. My husband’s coworkers were huge fans of those bites, so I decided to make something similar.
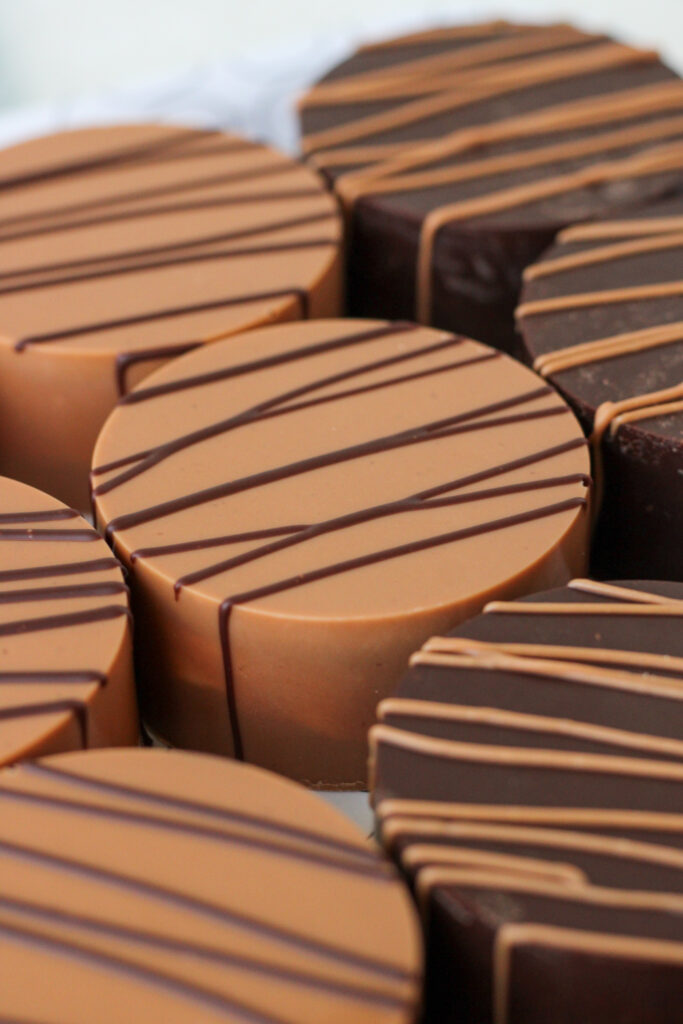
This time around, I wanted to incorporate cozy flavors like molasses and spices. At first, I was going to do a brown sugar cookie, but then it hit me. Gingerbread! That was exactly the flavor profile I was looking for.
Chewy Gingerbread Cookies
The only problem was, I didn’t have a gingerbread cookie recipe. My five spice molasses cookies might have worked, but I wanted a cut out cookie. So I pulled out my massive New Best Cookbook and looked up their recipe.

While I used their process, I cut the recipe in half and changed the rolling and cutting steps a smidge. These soft cookies were so easy to make in my food processor. Just be careful not to over process the dough.
Top Tips for Cut Out Cookies
- Do NOT over mix. Only mix to combine.
- Use a rolling pin with measurement guides to get an even thickness.
- Cold dough won’t spread as much in the oven.
- Bake a test cookie before baking the rest of the batch to determine the best bake time.
Molasses Marshmallow
My homemade marshmallow tends to be a crowd pleaser, so it was a no brainer here. It’s soft and sweet, but not sickeningly sweet. With the chocolate and gingerbread cookie, you don’t want to stuff too much more sweetness into these bites.
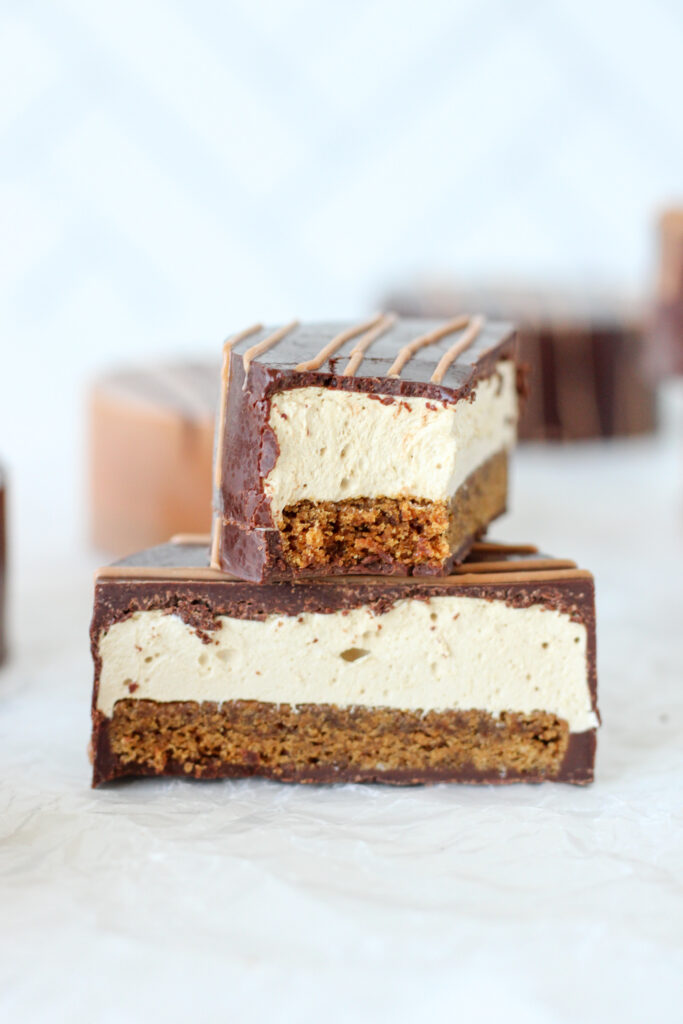
I subbed some brown sugar for a bit of the white sugar, and subbed in some molasses for a bit of the corn syrup. This gives the marshmallow a pale tan color with a hint of bittersweet molasses.
While I did consider adding some spices like ginger, cinnamon, and cloves, I ultimately decided not to. This allowed the spices in the gingerbread cookies to shine through and complement the molasses marshmallow.
Related Reading: Brown Butter & Spiced Pear Madeleines
Chocolate Shell
The whole idea for these gingerbread marshmallow bites is to encase the soft, sweet fillings in a thin chocolate shell. Last time, I made my shells too thick, so thin was my main focus this go round.

After an initial chocolate coating in the Oreo molds, take a close look and add a bit more chocolate to any areas that look too thin. I had a few very thin areas that could have used a bit more. Luckily, the soft, sticky marshmallow helps hold everything together.
Chocolate vs Candy Melts
Another thing I tried out this time was one mold with real chocolate and the other with candy melts. Each had pros and cons. Choose whichever sounds best to you, or try both!
Chocolate
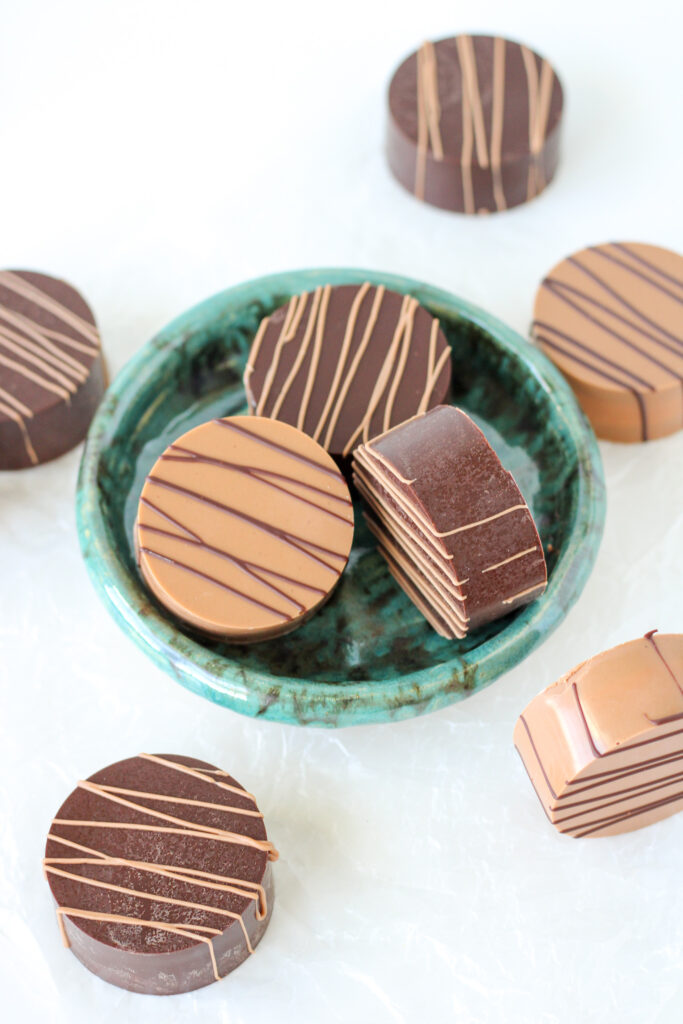
Pros: It was so much easier to work with because it melted to a drizzling consistency. I was able to simply tilt the molds around to coat them, then dump out the excess. This gave me a paper thin, beautiful chocolate shell.
Cons: I cannot temper chocolate to save my life, so I didn’t even try. That gave me a dull finish with a splotchy bloomed look.
Candy Melts

Pros: You don’t have to worry about tempering and you still end up with a shiny finish. They also come in a wide range of colors and flavors. I used salted caramel with these gingerbread marshmallow bites.
Cons: Very tricky to get a thin, even shell. When melted, my candy melts tend to gloop, which means I have to use a spatula to spread it out and it is not thin or even.
Recipe Tutorial
Gingerbread marshmallow bites look gorgeous, taste insane, yet are pretty easy to throw together. I made my gingerbread cookies first so that they had time to cool. The next day, I coated my Oreo molds and let them set up completely.
Once my first two elements were ready, it was time to whip up the molasses marshmallow. I immediately filled my molds, being sure to leave space for the cookie base and a thin coat of chocolate. After adding the cookie, I let them sit for about 15- 30 minutes before covering with a final coat of chocolate.
Be sure to let that set up completely before unmolding. Drizzle with melted chocolate or candy melts for a picture perfect finish! Watch the step by step recipe video to see all those little details!
Extra Cookie Bites
As much as I love making these gingerbread marshmallow bites, I find coating the Oreo molds to be tedious, plus it uses a lot of chocolate. I had extra gingerbread cookies and molasses marshmallow, so I filled them and made marshmallow sandwich cookies!
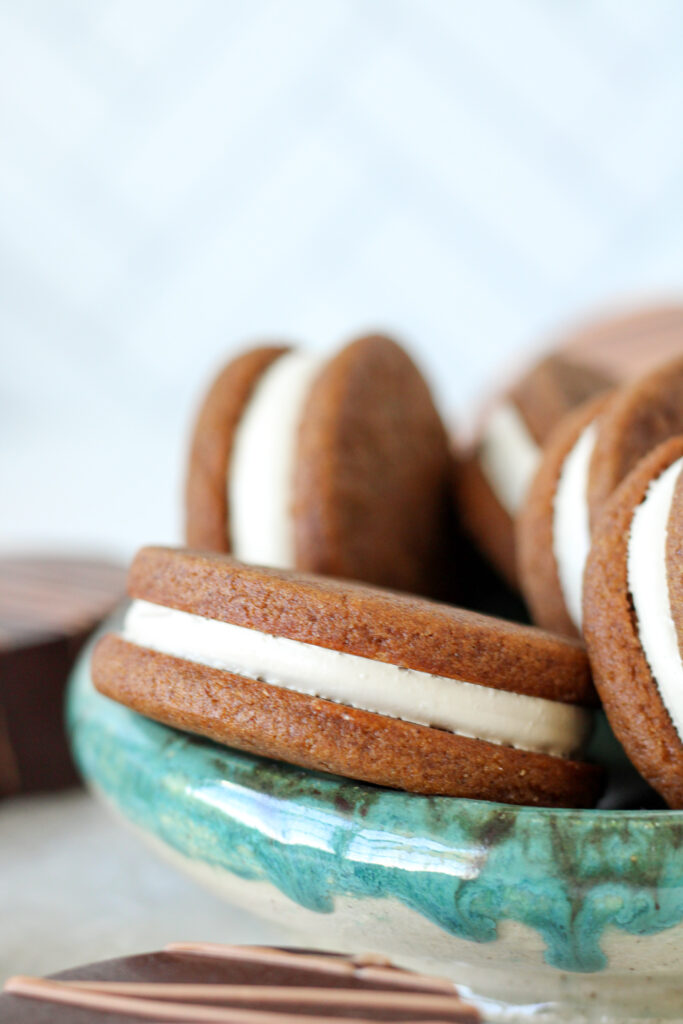
If you don’t have the chocolate covered Oreo molds and don’t want to buy them, just make all of these as sandwich cookies. You could dunk one side in chocolate or go light with just a drizzle. You’ll have all the elements in play, and they will still look gorgeous.
Related Reading: Salted Caramel Macarons
Enjoy!
A thin chocolate shell that melts in your mouth is filled with soft molasses marshmallow and a chewy gingerbread cookie. These gingerbread marshmallow bites are delicious, beautiful, and perfectly capture some of the best flavors of the season.
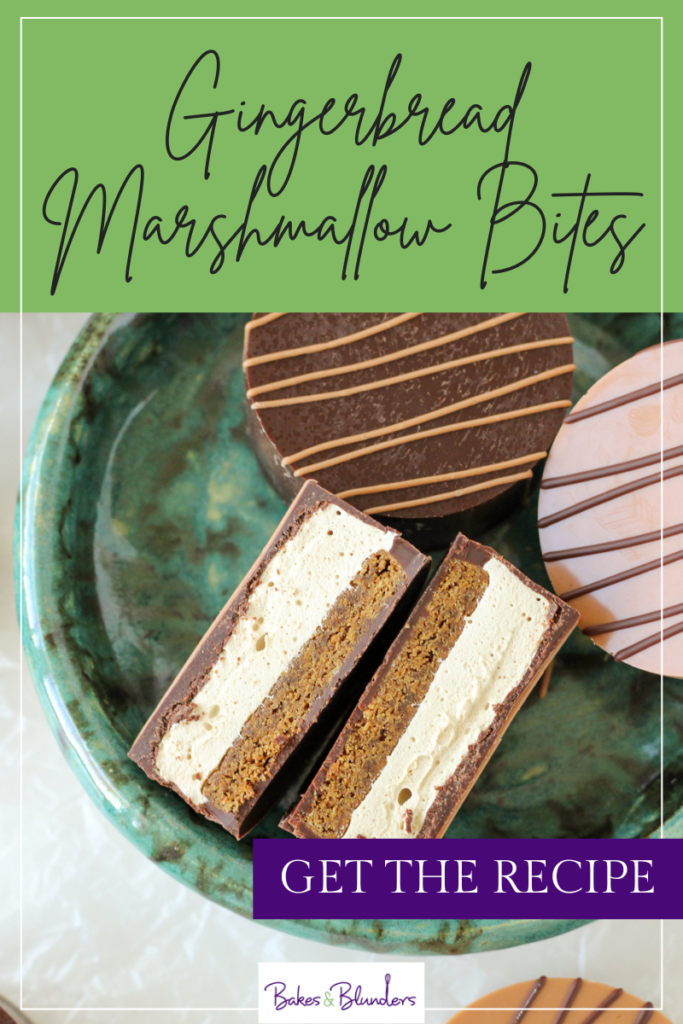
I hope you get to make a batch of these soon! If you do, leave a comment and let me know what you think.
Gingerbread Marshmallow Bites
Ingredients
Chewy Gingerbread Cookies
- 215 g all purpose flour
- 75 g dark brown sugar
- 1/2 Tbsp cinnamon
- 1/2 Tbsp ginger
- 1/4 tsp cloves
- 1/4 tsp baking soda
- 1/4 tsp salt
- 6 Tbsp unsalted butter cubed, soft but cool
- 115 g molasses
- 1 Tbsp whole milk room temperature
Shell
- 315 - 350 g chocolate or candy melts chopped
- 1- 2 tsps canola oil
Molasses Marshmallow
- 1 pkt unflavored gelatin
- 80 ml water divided
- 100 g sugar
- 30 g dark brown sugar
- 20 g light corn syrup
- 20 g molasses
- Pinch of salt
- 1 tsp vanilla
Instructions
Chewy Gingerbread Cookies
- Add the flour, brown sugar, cinnamon, ginger, cloves, baking soda, and salt to a food processor. Process on low to combine the dry ingredients.
- Dot the dry ingredients with the soft, but cool cubed butter. Process until you have a sandy texture, about 15 seconds.
- Combine molasses and milk and stir well. With the food processor on low, drizzle in the liquids. Continue to process until a soft mass of dough forms, about 15- 30 seconds.
- Turn the dough out onto a piece of cling wrap. Press into a disc, wrap, then chill for at least 2 hours or even overnight.
- Shortly before you are ready to roll the dough out, preheat the oven to 350℉. Line a baking sheet or two with silicone mats or parchment paper.
- Between two pieces of parchment paper, roll the dough out to 1/4" thick (6 mm). If the dough is too stiff and cold, let it sit on the counter for no more than 15 minutes before rolling.
- Cut out circles that will fit into your molds, keeping in mind that cookies will spread a bit in the oven. My cutter was 4 cm. Place the circles onto a tray and chill for 15- 30 minutes. Press the dough scraps together and form a disc. Wrap the dough up and chill in the fridge for about 15 minutes before repeating the process.
- Place the chilled cookie circles onto a prepared baking sheet. You should be able to fit about 12 cookies onto a sheet. Bake for about 8 minutes. When you lightly touch the top of a cookie, it should not leave an indent.
- Cool for 2- 5 minutes on the sheet before transferring the cookies to a cooling rack. Once cool, you can store the cookies in an airtight container until you need them.
Shell
- Melt chocolate or candy melts in the microwave on half power in 30 second bursts, stirring well after each. Do NOT overheat. For every 115g of chocolate/ melts stir in 1/2 tsp of canola oil.
- Apply a thin coat of melts to the Oreo molds. It's okay if there are thin areas. Let the melts firm up, then apply a second thin coat to any patchy areas to create a sturdy, even shell.
- Once you are happy with how the molds are coated, and the shell is completely firm, begin making the marshmallow.
Molasses Marshmallow
- Fit a large piping bag with a round piping tip and place in a large cup so that it is ready to be filled. Set aside.
- In the bowl of a stand mixer fitted with a balloon whisk, combine gelatin and 40 ml of water. Set aside to bloom while you move onto the next step.
- In a small saucepan, add sugars, corn syrup, molasses, salt, and the other 40 ml of water. Stir to combine and place over medium heat. No more stirring allowed!
- Bring the mixture to a boil and then cover for one or two minutes. The lid traps condensation and helps prevent crystallization. Remove the lid and continue to cook until the mixture hits 245°F. Remove from heat.
- Turn the mixer on medium-low and slowly pour the syrup into the gelatin. Bump the speed up to medium and whisk for 5 minutes.
- Increase the speed to high and whisk for 5 more minutes. Add vanilla, then whisk until combined. Immediately transfer the marshmallow to the prepared piping bag.
Assembly
- Pipe marshmallow into each mold cavity. You want to leave enough room for the cookie and another thin layer of chocolate/ candy melts.
- Top the marshmallow with a chewy gingerbread cookie that is facing down (the top of the cookie will be touching the marshmallow). Let the marshmallow bites firm up for about 15- 30 minutes.
- Apply a thin layer of chocolate/ candy melts to the bottom of the cookie and use a bench scraper or spatula to scrape off any excess. Let the bites sit until the candy melts are firm.
- Carefully remove the marshmallow bites from the molds. If the bottoms have any untidy edges, use a sharp pairing knife to trim them. Decorate with a drizzle of chocolate or candy melts. Store at room temperature for up to 5 days.
Notes
- I used half semisweet chocolate, and half salted caramel candy melts. Read the post for the pros and cons of each.
- If you don't want to use molds, just fill the cookies like a sandwich cookie.
- The recipe makes about 40 gingerbread cookies. I made 12 molded bites and used the rest of my marshmallow to fill as many cookies as I could. You will likely have extra cookies that are not filled.
My Favorite Products For This Recipe

Colleen
Hi there! I’m Colleen, a novice baker with a passion for learning and improving my bakes… and blunders. On Bakes and Blunders, you can find all sorts of tasty recipes that range in difficulty, but most importantly, I’ll try to explain the reason behind important steps. If you know why a recipe works, you can tweak and adapt it to suit your unique tastes, and you’ll be able to reliably produce some very delicious treats. If you love baking and want to expand and grow your skills, or if you are a casual baker and just need some pointers, my blog is right up your alley! Join me on my baking journey and we’ll learn how to make more impressive recipes together.

Molasses Cardamom Pancakes

You May Also Like

Cherry Blossom Macarons

Green Tea Macarons with Ginger Buttercream
