

Geode Cake: Vanilla and Mango Cake


My little guy just turned 5! He loves space, ninjas, and rocks and is just about to start Kindergarten. For this month’s project with the Sweet Arts Guid, we were challenged to create a geode cake. This was a perfect project for my baby’s birthday cake! It’s got a lot going on in the flavor department too. Vanilla cake, mango curd filling, and mango frosting. Let’s dive in!
This page contains affiliate links which means I may earn a commission if you use them. I only recommend tools that I use and trust.
Jump to Recipe
Making a Birthday Cake
My son loves mangoes, so I decided to make a mango frosting with some freeze dried mangoes I found at Trader Joe’s. To pair with this fun frosting, I decided to go with a mango curd filling and a basic vanilla cake. But you know I don’t do basic very well. So, I made the cake a vibrant teal-ish blue to match the geodes cuts and agate slices.

Let me break each of these components down for you and give you my best tips and tricks for each one! And don’t forget to check out my isomalt agate slices tutorial so you can make these awesome toppers.
Mango Curd
Fruit curds are basically fruit based custards. If you’ve never made a custard before, I suggest reading up on that with my cream puffs that are filled with vanilla pastry cream. I also suggest getting a rubber coated whisk. This will protect your saucepan from becoming scratched.
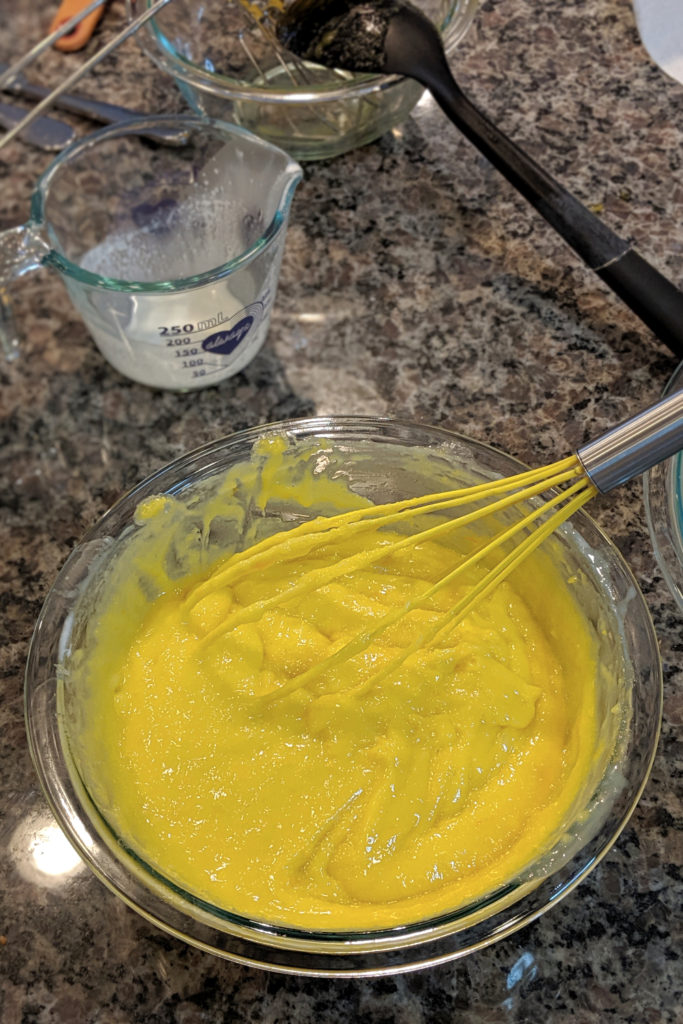
Make like easy and make this curd a day or two in advance. That will give it time to chill in the fridge and become nice and firm. You do NOT want to fill a cake with warm, soft mango curd. Yikes! Normally, I strain my custards, but this mango curd is a bit lumpy because of the fresh mango puree I whipped up. If you are very concerned about the texture, strain the mango puree before you make the curd.
Also… I keep thinking I’m going to type mango crud instead of curd.
Print Recipe
Vibrant Vanilla Cake
This vanilla cake is basically the same as the almond cake recipe, but I swapped almond extract out for vanilla bean paste. You can just use vanilla extract, but for my little man’s birthday I decided to whip out the big guns. I also colored it a vibrant blue/ teal hue and I love how it came out.

As you may know, I usually use this awesome cake pan set for all of my cakes and it’s actually made me a bit lazy. I barely remember how to cook cakes in bigger pans! And, as such, I think these layers got a hair overcooked. Cakes can go from perfect to dry in a flash. As soon as they begin to pull away from the sides, spring back when poked, and a skewer comes out clean, you’re good!
Mango Buttercream Frosting
My sweet husband likes to call this type of frosting my secret specialty. I love using pulverized freeze dried fruit to create flavorful frostings. Not only does it add an authentic fruit flavor, but it also reduces the amount of powdered sugar I need. That’s a win- win in my book!

The mango dust didn’t have as strong a flavor as I would’ve liked. But, just like the mango curd, I added a splash of orange flavor to brighten it up. In this case, I used a tiny bit of orange extract. It was just enough to add dimension without making this an orange flavored frosting. I also added some yellow and orange food gel to give it a light color.
Jump to Recipe
Geode Cake Tutorial
The geode cake style is a wonderful design for beginner cake decorators to try! Just like the isomalt agate slices I placed on top, the goal is not for perfection. Anything in nature is bound to be a bit haphazard, so there’s no “wrong” way to make this cake.

Supplies
- Rock candy
- Edible gold paint
- Gel food color
- Tweezers
- Paintbrushes
- High proof alcohol
Step by Step
Once the cakes are crumb coated and chilled, draw a rough outline of the hole you’d like to dig out. Make this long, fat, big, small, or any other which way you’d like! Dig out that chunk of cake and crumb coat the cavity. Chill for a bit more to really trap those crumbs.

Now you can apply your final coat on each layer. Chill, yet again, to firm up the rest of the cake. Then apply a final coat to the geode cavity. Fill this area in with rock candy, using tweezers if necessary. Chill again.
Print Recipe
Time to Paint!
Put some gel food color in a small bowl and paint the very center of the geodes. Add some alcohol to thin it out a smidge. If you’re extra, like me, use a small (clean) syringe that your kid didn’t use to take their medicine. Add about 2 ml to the gel. Paint around the center, but not all the way out. Add another 2 ml of alcohol and paint another layer. Leave the very edge of the rock candy white, if you like. Be very careful not to drip!

Trim the edge of the geode cut outs with edible gold paint for a polished finish. Chill, again, until the paint is dry. You just made a geode cake! Time to get stacking.
Putting it All Together
I’ve only made one tiered cake before, my funfetti cake with fondant ruffles, so this was still a bit nerve racking. Add some smoothie straw supports to the base layer. I did one in the middle that extended about an inch above the cake and then 3 supports around that.

Before I put together my 6 inch layer, I removed the small circle in the center of my cake board. This meant, I could slide the top layer onto this middle straw with no trouble. It also made sure my little cake wouldn’t slide off. Pipe a small bit of frosting around the cardboard edge and use a clean finger to smooth. This will hide that ugly board.
You can leave your cake as is, but why stop there? Make some easy isomalt agate slices to top off your beauty! I’ve got a step by step tutorial for you right here that will guide you through it. Cut a slit into the top of your cake and gently press an agate slice into place. I like to then pipe a bit of frosting behind it to add support.
Enjoy!

This geode cake looks stunning and impressive, but it’s actually super easy for anyone to create. Besides how beautiful it looks, you’re also going to love the flavors of this vanilla cake with mango curd and mango frosting.

Vanilla Cake with Mango Curd Filling and Mango Frosting
Ingredients
Mango Puree
- 3-4 mangoes
- 1/4 cup sugar
- 3 Tbsps water
Mango Curd
- 3/4 cup sugar
- 1 egg
- 3 egg yolks
- 5 Tbsps cornstarch sifted
- 1/2 cup heavy cream
- 1 tsp orange zest
- 2 Tbsps orange juice
Vanilla Cake
- 14 oz all- purpose flour
- 2 1/2 tsps baking powder
- 1/2 tsp salt
- 10 oz milk room temperature
- 2 oz canola oil
- 2 tsps vanilla bean paste or extract
- 5 drops blue food gel
- 1 tsp teal food gel
- 8 oz unsalted butter room temperature
- 14 oz sugar
- 6 egg whites room temperature
Mango Buttercream Frosting
- 3.4 oz freeze dried mango
- 2 cups unsalted butter room temperature
- 2- 3 Tbsps cream
- 1/4 tsp orange extract
- 7 cups powdered sugar sifted
- Pinch of salt
- Yellow and orange food gel optional
Instructions
Mango Puree
- Dice the mangoes and combine in a food processor with the other ingredients. Process until smooth, scraping the bowl down as necessary.
- Measure out 2 cups of this sweetened mango puree. If you want a perfectly smooth curd, you can strain out the larger chunks of fruit. This is optional. If you are short on puree, you can sub in some mango baby food.
Mango Curd
- Heat 2 cups of the sweetened mango puree in a large saucepan over medium- low heat just until it begins to bubble. Turn off the heat.
- In a medium bowl, beat eggs and sugar for 1 minute until pale and creamy. Add the sifted cornstarch and whisk until well combined.
- Ladle hot puree into the egg mixture one spoonful at a time. Whisk very well after each addition. If the puree has cooled down too much, warm it back up first.
- After all of the mango puree has been whisked into the egg mixture, pour all of this back into the saucepan and place over medium- low heat again. Heat, stirring constantly, until thick. It will go from soupy to thick pudding in a snap, but it will take a bit to get there.
- Pour the thick mixture into a clean bowl. Whisk in heavy cream, orange zest, and orange juice.
- Press cling wrap onto the surface of the curd and let the mixture cool down to room temperature before storing it in the fridge.
Vanilla Cake
- Preheat oven to 350°F. Spray two 8 inch and two 6 inch cake pans with baking spray and line with parchment rounds. Soak cake strips. Set aside.
- In a medium bowl, sift together the flour, baking powder, and salt. Set aside.
- In a measuring glass, combine the milk, oil, vanilla, and food gel. Set aside.
- Beat the butter in a stand mixer until smooth. Add the sugar and beat until light and fluffy, about 2 minutes, scraping the bowl down as needed.
- Add the egg whites one at a time, more or less, mixing until combined after each addition. Scrape down the bowl.
- Add 1/3 of the dry ingredients to the mixer and beat until just combined. Add half of the liquids and beat until just combined. Repeat with another third of the dry ingredients, the remainder of the liquids, and finally the remainder of the dry. Scrape down the bowl as needed.
- Wring out cake strips and wrap around the pans. Add 2 cups of batter to each 8 inch pan and 1 cup of batter to each 6 inch pan.
- Bake for 28- 32 minutes. Check that each cake layer is done before removing it from the oven. The edges should just begin to pull away from the pan, the top will spring back when poked, and a skewer will come out clean.
- Cool in the pans for 10 minutes before inverting onto a cooling rack. Cool completely before frosting and assembly.
Mango Buttercream Frosting
- Pulse the freeze dried mango in a food processor until fine. Sift out the larger chunks and add to a large bowl full of the sifted powdered sugar.
- With a stand mixer, beat the butter until pale and fluffy, about 5 minutes. Scrape the bowl down as needed.
- Add about a third of the mango/ sugar mixture and a tablespoon of cream to the bowl of the stand mixer. Beat on low until combined, then bump the speed up to medium- low for a minute.
- Scrape down the bowl and add another third of the sugar mixture and another tablespoon of cream. Beat on low until combined, then bump the speed up to medium- low for a minute.
- Scrape down the bowl and add the rest of the sugar mix, orange extract, food gel, and a pinch of salt. Beat on low until combined, then bump the speed up to medium- low for a minute.*I used 2 drops of yellow gel and 3 drops of orange gel.
- Scrape the bowl down and adjust the flavor or add more cream if necessary. Beat on low for about 5 minutes.
Cake Assembly
- Place a cake board on your turntable, add a smear of frosting, and top with a cake layer.
- Pipe a ring of frosting around the edge of the layer. Fill in the center with the chilled mango curd. Make sure not to get the curd filling taller than the frosting border.
- Top with the other cake layer, bottom side up. Apply a crumb coat and chill for 15 minutes.
- Repeat this with the other set of cake layers. Follow the directions in the post to create the geode cake look.
Notes
- I used every bit of the mango frosting. There will not be any leftover!
- This makes a lot of mango curd. You only need a bit, so you can always try halving the recipe.
My Favorite Products for this Recipe

Colleen
Hi there! I’m Colleen, a novice baker with a passion for learning and improving my bakes… and blunders. On Bakes and Blunders, you can find all sorts of tasty recipes that range in difficulty, but most importantly, I’ll try to explain the reason behind important steps. If you know why a recipe works, you can tweak and adapt it to suit your unique tastes, and you’ll be able to reliably produce some very delicious treats. If you love baking and want to expand and grow your skills, or if you are a casual baker and just need some pointers, my blog is right up your alley! Join me on my baking journey and we’ll learn how to make more impressive recipes together.


6 Comments
Cindy
What an amazing cake! I love how creative you are. It’s not only gorgeous to look at but full of flavor too, I’m sure.
Colleen
This one was a lot of fun to bake, put together, and decorate 😀
Angela Greven | Mean Green Chef
First, love the flavor combination!! Second what a cool and beautiful cake, it’s totally perfect for a little boys birthday! Or heck even mine! Fabulous job, never seen this done before it’s awesome 🙂
Colleen
Thanks! I love everything about it 😀 Especially that mango curd.
Pauline Reynolds
I have always wanted to make one of these. My whole family are Rick hounds but it has always seemed so intimidating. You make it look easy.
Colleen
It really is as easy as you want to make it. You can totally pull this off! My best advice is to chill the cake constantly. If it starts to get tricky to work with, shove it in the fridge for 20 minutes and continue!