

How to Make a Wireless Gum Paste Peony


We’ve all seen those beautiful cakes with stunning gum paste flowers. With my step by step tutorial, you’ll be able to make your own wireless gum paste peony with just a handful of basic tools. These peonies look perfect on top of your showstopper cake. Let me show you how to achieve this look on your own!
This page contains affiliate links which means I may earn a commission as an Amazon Associate (or other affiliate program) from qualifying purchases. I only recommend products that I use and trust.
This tutorial was originally published on June 3, 2019 and was republished on March 1, 2021 with updates.
Why Make a Gum Paste Peony?
This tutorial is brought to you by the May 2019 project with the Sweet Arts Guild! Our task this past month was to create gum paste flowers. I’ve never tried this before, but it is a skill I’ve been interested in. So, I decided to do peonies because it worked with the flowers my friend was using in her wedding and I just happen to love peonies!

Since I don’t make gum paste peonies often, I wanted a way to make them with only the most basic tools. Gum paste flowers can be very complex. If you’re a beginner, like me, I think you’ll appreciate that we’re sticking to simple, affordable supplies.
Supplies
- Peony petal cutters
- Fondant roller
- Foam pad
- Gum paste
- Ball tool
- Foam balls
- Cupcake liners (mini and regular)
Optional
- Fondant duster
- Nitrile gloves
- Gel food color
- Small paint brush
- Piping gel or water
- Color dust
I bought this mini fondant kit when I made the Eagle Cake. It’s very handy and includes a ball tool, fondant roller, and a foam pad. I actually found this pad to be too thin. If you can, spring for this flower pad.
How to Make a Wireless Gum Paste Peony
- Knead your gum paste until smooth. Roll out a small portion and use this to cover a 1” foam ball. Pinch off the end and roll in your hands to smooth. This is your center. Set the ball in a mini cupcake liner to dry slightly while you move onto the next step. NOTE: If you don’t want to use foam, a ball of gum paste will work too.
- Roll out another small portion of gum paste until very thin. Use the smallest peony petal cutter to stamp out a layer. Place the petals on your flower pad and use a fondant ball tool to frill and thin the edges.
- Now bring the center back. Place it in the center of your petals. One by one, pull the petals up over the ball. With the final petal, tuck it under the first petal so that they all overlap and meet in the center. If there are any pokey edges, gently press them flat. Place the bud in a mini cupcake liner and set aside to dry for 15 minutes.

- Roll out another small portion of gum paste until very thin. Use the smallest peony petal cutter to stamp out a layer. Place the petals on your flower pad and use a fondant ball tool to frill and thin the edges. (This is the same as step 2).
- Now place your gum paste bud in the center of your petals. One by one, pull the petals up towards the center of the bud. Place scraps of paper towel in between the petal layers to prevent them from sticking to the bud. You want this layer to be mostly closed, but starting to open up. Place the flower in a mini cupcake liner and set aside to dry for 15 minutes.
- Repeat steps 4 and 5 with the remaining 3 petal cutters. You will need to move up to a regular cupcake liner. For the last layer of petals, I use a cupcake liner that has been pulled apart and expanded a bit. I try to make each layer of petals a bit more open than the last layer. Once you’ve finished. Let the gum paste peony dry overnight, then remove the paper towel scraps.
For All You Visual Learners…
Making a wireless gum paste peony is actually pretty easy. But it’s kinda difficult to describe with words alone. I highly recommend watching my video tutorial for these gum paste peonies.
It’s not a very long video, but I made sure to show you every single step. After you watch this, I know you’ll feel prepared to make your very own gum paste flower!
Related Reading: 7 Reasons You Can’t Make a Perfect Cake
Tips and Tricks
- Gum paste dries out very quickly. Whenever you aren’t using a portion of it, pop it in an airtight container or baggie. That will prevent it from drying out too quickly.
- If you find that the gum paste is sticking to your work surface, use your fondant duster to lightly dust the area. Be careful not to use too much or you could dry out the gum paste too quickly.
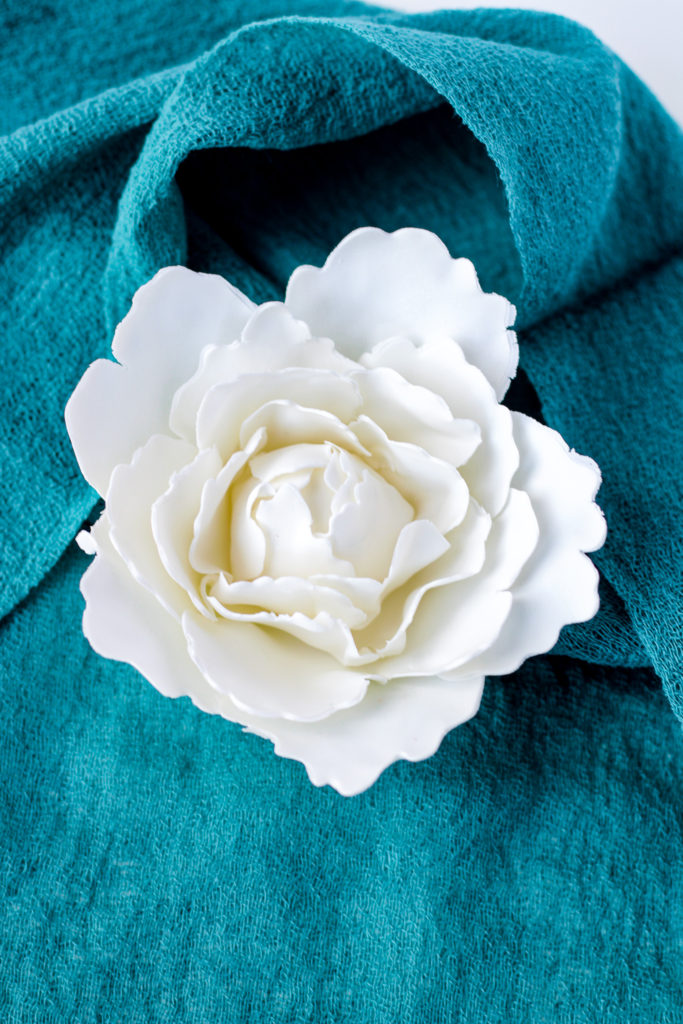
- Make the petals as thick or thin as you like. The thinner petals look more realistic and delicate, but thicker petals can have more character and dimension.
- If the petals keep falling open, use a bit of piping gel or water to attach them to the previous layer of petals.
- Don’t fret about getting every petal to be perfect. Nature is imperfect, so your gum paste peony should be too!
How to Color a Gum Paste Peony
You’ve got two choices here. Use white gum paste to make your flower, then dust with color to create a beautiful, light colored peony. You can use multiple shades and add a bit of shine with luster dust. This will give you a lighter, less intense color.

Or use knead some gel color into your gum paste before you begin. If you go this route, I still suggest dusting with a complimentary shade to add dimension to your finished gum paste peony. This method will also give you a deeper color.
Open vs. Closed Peony
With this tutorial, you can make an open or a closed peony. While the petals are still pliable, you can shape them however you’d like. Play around with how you place them.
Use piping gel to “glue” the petals in a more closed position. You can still place paper towel scraps in between the petals to create small gaps.

For a more opened peony, pull the layers apart more. You can use different sized containers to mold and shape the size of your peony. Use as many layers of petals as you’d like for a more voluminous flower, or just a few to make a pretty bud.
Time to Decorate a Cake
I love how easy wireless gum paste peonies are to make, but without a wire, you have to place the peony on top or next to your cake. You can attach the flower to the top of your cake with some buttercream. Watch how I did that with this mini tiered wedding cake.
Get to Work!

Gum paste peonies are a beautiful flower for beginner cake decorators to try out. With this fantastic peony petal set, you don’t need to worry about wires and applying individual petals which can be tedious and time consuming. Play around with the colors and the petal thickness to create your own unique gum paste peonies!

Colleen
Hi there! I’m Colleen, a novice baker with a passion for learning and improving my bakes… and blunders. On Bakes and Blunders, you can find all sorts of tasty recipes that range in difficulty, but most importantly, I’ll try to explain the reason behind important steps. If you know why a recipe works, you can tweak and adapt it to suit your unique tastes, and you’ll be able to reliably produce some very delicious treats. If you love baking and want to expand and grow your skills, or if you are a casual baker and just need some pointers, my blog is right up your alley! Join me on my baking journey and we’ll learn how to make more impressive recipes together.




6 Comments
deepa jaisingh
Oh i was drooling all this time. yumm and easy thanks for sharing..
Colleen
Thanks for checking it out 🙂
Trish Veltman
I thought they would be very complicated to make, but you’ve explained it all so clearly I think I might be able to do them! I love crqafting stuff but never had much success with cakey things but this gum paste looks like a really nice thing to play with. My granddaughter might get a unicorn in a field of flowers birthday cake from me this year!
Colleen
If you can craft, you should be able to do this. I’m not always so crafty, so this was definitely out of my comfort zone! It was a lot like playdough 🙂
Holly Bird
This is wonderful…you make it look so easy! I have always wanted to learn how to do this!! Thank you for the great instructions!
Colleen
If you give it a try, let me know how it goes!