Mini Brownie Sundaes


Mini brownie sundaes are cute little desserts that are so delicious, you might find yourself unable to resist just one more bite! Each fudgy brownie cup is filled with stabilized whipped cream, then topped with a little drizzle of chocolate sauce, rainbow sprinkles, and a bright red cherry.
This page contains affiliate links which means I may earn a commission as an Amazon Associate (or other affiliate program) from qualifying purchases. I only recommend products that I use and trust.
Dreaming of Mini Brownie Sundaes
I first had this idea for mini brownie sundaes about four years ago. Ever since then, I’d randomly get a flash of this adorable treat in my head, but with so many recipes to bake, it always got pushed down the line.
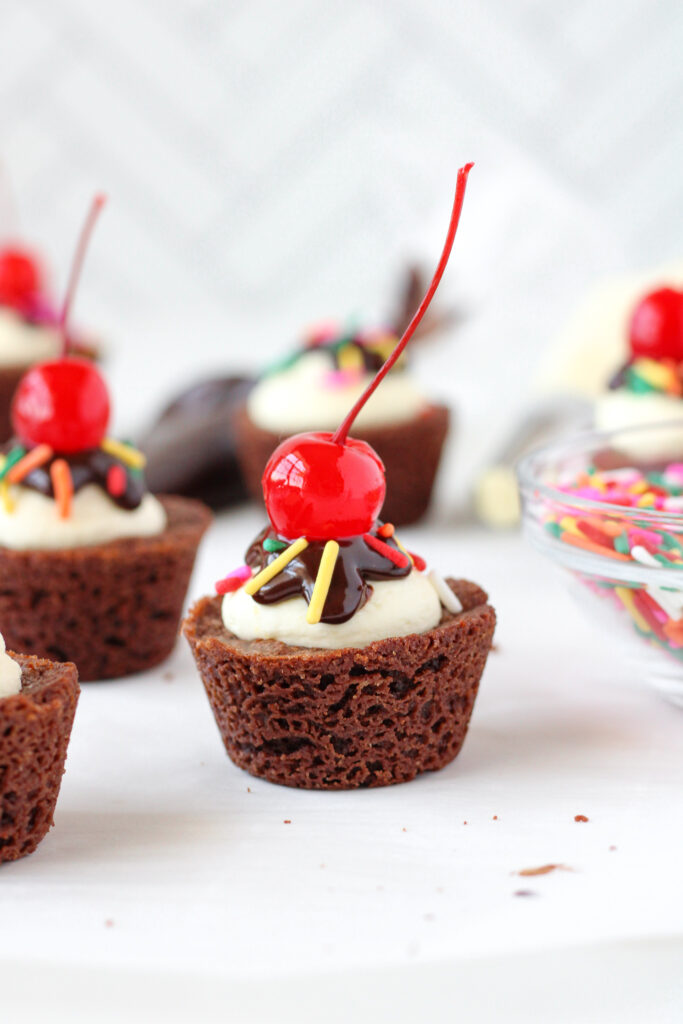
That is, until y’all definitively told me to make the dang sundaes already! Point taken. I can’t believe I waited so long to make them!! These little brownie bites check every box, and they’re just big enough to satisfy your sweet tooth without regretting any life choices.

Mini Brownie Bites
These little brownie bites are super easy to make from scratch. It’s based off of the brownie base in my Mint Chocolate Brownies. You should get between 40- 48 brownie bites, depending on how you scoop them. I also suggest you let them cool completely before removing them from the pan.

I’ve not always enjoyed making brownies, mostly because I find it difficult to figure out when they’re done. You can’t go by color or touch. What I’ve figured out is, you want the edges to be set and a toothpick inserted in the center should have moist crumbs on it, but not goo.
Silky Chocolate Sauce
This is basically chocolate ganache, but we’ll call it a chocolate sauce for the sake of these brownie bite sundaes. I love adding a bit of corn syrup to my ganache, er, sauce because it keeps the texture soft, and adds a beautiful shine.
For the best results, you want the sauce to be on the warm side of room temperature. I piped it onto some of the brownie sundaes even when it was completely cool and it worked just fine. It won’t run down the sides, but it will smooth and settle a bit.
The BEST Whipped Cream
Unless you are eating within minutes of filling the mini brownie sundaes, you really must use a stabilized whipped cream. This recipe comes from my Small Batch Mini Pavlovas recipe and you may want to eat it with a spoon. However, whipped cream stabilized with gelatin would probably be fine too.

The big thing with whipped cream is to not over whip. I like to use an electric hand mixer to get it all started (saves my poor inflamed tendons), but once it’s leaving tracks, I switch to a balloon whisk. This whipped cream will continue to thicken as it sits thanks to the pudding mix. Shoot for soft peaks. If it’s too limp when you go to fill them, just give the cream a little whisk.
Related Reading: Cookie Dough Brownies
Putting It All Together
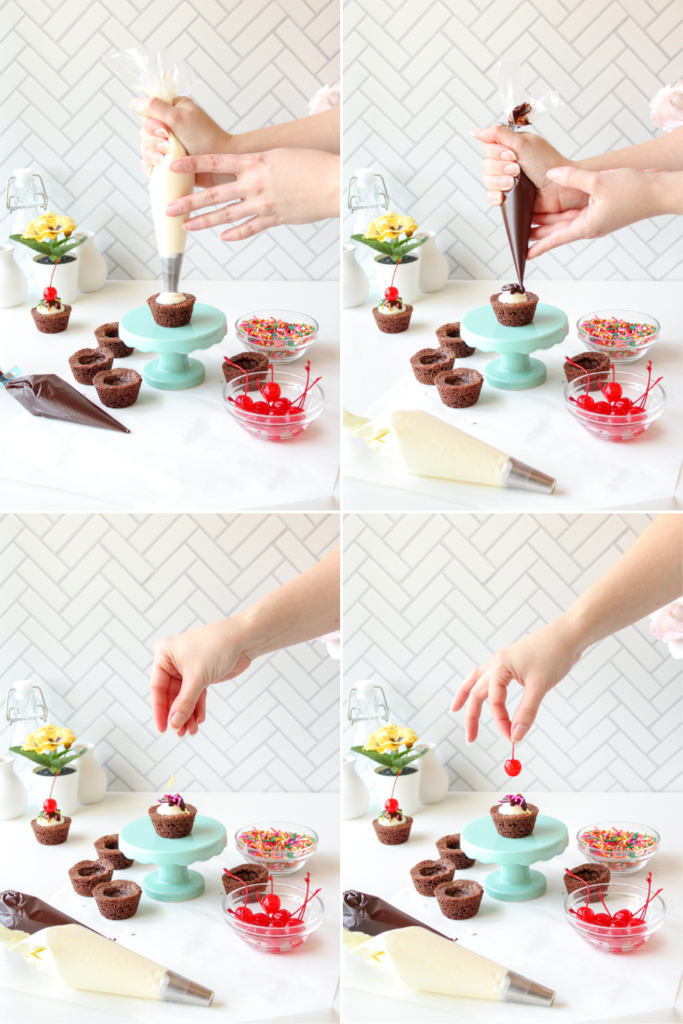
Check out this recipe video to walk you through each step of making and assembling your own mini brownie sundaes! I used a large round piping tip to fill my brownie bites. You could use any tip that you like, or just snip the end off of a piping bag. Heck, you could even snip a corner off of a plastic baggie.
Snip a tiny bit off of your bag filled with chocolate sauce and pipe a blob onto the whipped cream. I do a wonky star shape to create an organic looking fudge drip. Immediately add your sprinkles and gently top with a maraschino cherry! Serve and eat within 2 hours, or place in the fridge.
Perfect Summer Dessert
I think this recipe is perfect for serving a crowd or as a part of a dessert table. Make these mini brownie sundaes to celebrate summer, whether it’s just started, in full swing, or it’s about time to head back to school.

If you enjoyed this recipe, consider subscribing to the Bakes & Blunders email list! You’ll not only get access to my baking library with over a dozen helpful resources, you’ll get one email a week from me with a new recipe, baking tips, or tutorial. Enjoy!

Mini Brownie Sundaes
Ingredients
Mini Brownie Bites
- 4 oz unsweetened chocolate bar chopped
- 4 oz unsalted butter cubed
- 10 oz sugar
- 4 oz brown sugar
- 3 eggs room temperature
- 2 tsps vanilla
- 4.5 oz all purpose flour
Chocolate Sauce
- 2 oz semisweet chocolate chopped
- 1 oz heavy cream (2 Tbsps)
- 1 Tbsp corn syrup
Stabilized Whipped Cream
- 12 fl oz heavy cream
- 3 Tbsps instant vanilla pudding mix
Toppings
- Rainbow sprinkles
- Maraschino cherries
Instructions
Mini Brownie Bites
- Preheat the oven to 350℉. Spray two mini cupcake pans with baking spray and set aside.
- Over a double boiler, or in a microwave at 50% power, melt the unsweetened chocolate and butter. Stir until smooth. Set aside to cool slightly.
- In a bowl, beat the sugars, eggs, and vanilla until well combined. Scrape the bowl down as needed. Add the flour and fold until there are no more dry pockets and the mixture is just combined.
- Add the chocolate mixture to the bowl and fold until evenly combined and there are no light streaks in the batter.
- Divide the batter evenly among the pans with a small cookie scoop or a slightly mounded tablespoon. Bake 14- 16 minutes. The edges should be set and a toothpick should come out with moist crumbs.
- Once the brownies come out of the oven, wait 5 minutes, then gently press an indent into each bite. Don't go too deep, or too close to the edge of the brownie. This is just a little cup to help hold the filling.
- Cool completely in the pan. Then loosen the edges of the mini brownie bites with a thin plastic spatula and invert the bites onto a cooling rack. If any won't come out, let the pan cool a bit longer. Then, try to spin them in the cavity before removing.
Chocolate Sauce
- Place the semisweet chocolate in a small heatproof bowl and the cream in an even smaller heatproof bowl. Microwave the cream for 15 seconds, then pour over the chocolate. Add the corn syrup and stir until smooth. If needed, place the mixture in the microwave for 10- 20 seconds at 50% power. Stir well between bursts.
- Set the chocolate sauce aside to cool slightly.
Stabilized Whipped Cream
- Beat the very cold cream on a medium- low speed until it begins to thicken slightly, about 1- 2 minutes. Then add the pudding mix. Beat on a medium speed until you can see tracks in the cream, another 1- 2 minutes.
- Finish whipping the cream with a balloon whisk. You want soft peaks. The cream will thicken as it sits as well.
Assembly
- Transfer the chocolate sauce to a small piping bag. Fit a slightly larger piping bag with a round piping tip (I used 2A) and fill with whipped cream. Have your sprinkles and cherries handy.
- Pipe a generous blob of whipped cream into the cooled brownie cup. Snip a tiny bit off the end of the piping bag full of chocolate sauce. Pipe a star shaped drizzle onto the mound of whipped cream. Top with sprinkles and a cherry.
- Serve and eat within 2- 4 hours, or place in an airtight container in the fridge.
Notes
- You should get between 40- 48 brownie bites, depending on how you portion the batter.
- Calorie count does not include sprinkles or cherries.
My Favorite Products For This Recipe

Colleen
Hi there! I’m Colleen, a novice baker with a passion for learning and improving my bakes… and blunders. On Bakes and Blunders, you can find all sorts of tasty recipes that range in difficulty, but most importantly, I’ll try to explain the reason behind important steps. If you know why a recipe works, you can tweak and adapt it to suit your unique tastes, and you’ll be able to reliably produce some very delicious treats. If you love baking and want to expand and grow your skills, or if you are a casual baker and just need some pointers, my blog is right up your alley! Join me on my baking journey and we’ll learn how to make more impressive recipes together.


You May Also Like

Pandan Rice Krispie Treats with Coconut

Mini Mojito Cupcakes