

Chocolate Ganache Tutorial: A Step by Step Guide


Chocolate ganache is a great item to have in your baking skill set. It has so many tasty uses like chocolate dip, drizzle, frosting, filling, you name it! Best of all, it only requires two ingredients. You don’t get much easier than that, but it can still be tricky. This chocolate ganache tutorial is going to take you through the whole process.
This page contains affiliate links which means I may earn a commission as an Amazon Associate (or other affiliate program) from qualifying purchases. I only recommend products that I use and trust.
Down to the Basics
Before we get down to business, let’s chat about what chocolate ganache is. It’s chocolate and hot cream that has been combined to form a delicious chocolate sauce. As this chocolate sauce cools, it thickens and can become quite hard. The different ratios of chocolate vs cream can make a big impact on how the chocolate ganache can be used.

Chocolate ganache is incredibly versatile, but you need to figure out what you’re going to use it on before you can make a batch. For drizzling on a cake (like this bundt cake), you want a looser consistency. But if you’re going to frost a cake or pipe onto cupcakes, you’ll need a firmer batch. The consistency is dependent on how much chocolate you use.
The Ingredients
With only two ingredients, this little bit couldn’t be simpler. Heavy cream is heavy cream and I’ve got no opinion on what brand you use. However, the chocolate you use makes a very big difference on your chocolate ganache. If you use low quality chocolate, your ganache will not taste good. Shocker.

Another thing to keep in mind is that chocolate ganache will “sweat” once it’s been refrigerated, so keep your frosted cakes at room temperature if possible. If it is not possible, refrigerate it in a box or a carrying case. Then let it come to room temperature while still packaged up. Whatever you do, don’t try to wipe away any condensation on the cake.
Choosing Your Chocolate
Chocolate chips and candy bars aren’t the best choice, but I have absolutely used them, especially when that’s all you’ve got. They have additives to prevent melting so that they stay pretty, but this means they may not melt well for your chocolate ganache. I’m a humble home baker, and I like Baker’s baking chocolate. You can find it in any grocery store.

The flavor of chocolate ganache you make also makes a difference. Basically, you’ll be making dark chocolate, milk chocolate, or white chocolate ganache. Dark chocolate is firmer and my preferred ganache. Milk chocolate is softer and will need a higher chocolate to cream ratio. White chocolate isn’t even chocolate and needs very little cream or it will never set.
Chocolate Ratios
These ratios are chocolate to cream amounts. If ratios confuse you (no shame!) check out Sugar Geek Show for more of an explanation. Liz is amazing and knows so much more information about how to get the best chocolate ganache.
Dark Chocolate Drizzle: 1:1
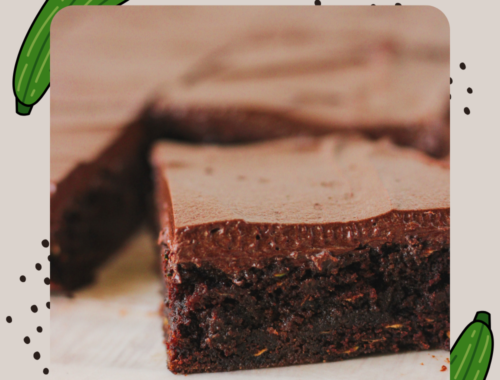
- This is great for smothering a bundt cake or zucchini brownies, filling cupcakes or cakes, and topping ice cream. When it sets it will be a bit firm, but it softens at room temperature.
Dark Chocolate Frosting: 2:1
- Use this to make a drip cake, frost a cake after the ganache cools, or make truffles. Once it sets it will be very firm and steady so it’s great for cake decorating.
Milk Chocolate Frosting: 2.5:1
- Milk chocolate needs more chocolate to have the same consistency as the Dark Chocolate Ganache Frosting.
White Chocolate Frosting: 3:1
- White Chocolate has the highest ratio because it isn’t actually chocolate and will not set if there is too much cream. This ratio works best for me when I’m using candy melts. The nice thing about white chocolate ganache is that it won’t sweat once you put the cake in the fridge. You also change up the method a smidge. Since the liquid amount is so low, warm up the chocolate before you add the warm cream. Check out the white chocolate ganache drip I did on this Coffee Cake Layer Cake or my Pink Champagne Cake. I’ve found that I sometimes need to go up to a 6:1 ratio if I’m making a white chocolate ganache with water.
Chocolate Ganache Tutorial
The steps for making chocolate ganache are always the same. Depending on how you’ll be using the ganache and the type of chocolate you use, the amount of each ingredient will differ.

- Use a scale to weigh out the chocolate and cream.
- Place chocolate in a glass bowl, or at least one that is microwaveable. Set aside.
- Warm your cream on the stove top or microwave until it is very hot, but not boiling.
- Pour the hot cream over the chocolate, pushing the chocolate down so that it is completely submerged. Let it sit for 5 minutes to soften.
- Whisk the chocolate mixture until it becomes a smooth sauce. It may look like nothing is happening at first, but all of sudden it will come together.
- Let the chocolate ganache cool, loosely covered, at room temperature or in the fridge until the desired consistency is reached.
Related Reading: 7 Reasons You Can’t Make a Perfect Cake
Troubleshooting
I promise you, this stuff is pretty easy, but if you run into some problems, here are some quick fixes:
Lumpy or Grainy: Microwave for 5- 10 seconds to melt the chocolate. Stir until smooth. Repeat if necessary.
Thin: Add more chocolate, microwave up to 30 seconds, and stir until smooth.
Thick: Add some warm cream and stir until smooth.

I am not a chocolate ganache expert, but I’ve done a lot of reading up on the subject over the past few months. You should absolutely check out the Sugar Geek Show’s post about chocolate ganache. Liz also has a YouTube video at the end of the post that is a great resource.
Try it Out!

Now that you know everything that there is to know about chocolate ganache, give it a go! Have confidence because you know how to fix the most common issues you can run into. And if you just eat it with a spoon instead of using it in a recipe, I won’t judge you. It’s possible that I’ve done this with leftover ganache before… Pin this post for later so that you can come back to it in the future!
My Favorite Products For This Recipe

Colleen
Hi there! I’m Colleen, a novice baker with a passion for learning and improving my bakes… and blunders. On Bakes and Blunders, you can find all sorts of tasty recipes that range in difficulty, but most importantly, I’ll try to explain the reason behind important steps. If you know why a recipe works, you can tweak and adapt it to suit your unique tastes, and you’ll be able to reliably produce some very delicious treats. If you love baking and want to expand and grow your skills, or if you are a casual baker and just need some pointers, my blog is right up your alley! Join me on my baking journey and we’ll learn how to make more impressive recipes together.




10 Comments
Kristy B
I’ve always thought that ganache was a very complicated process, but you have made it very simple. My kids would love this on a cake!
Colleen
Glad I could help!
milestonetravelsllc
Great instructions and lots of information for beginners. As a cake decorator ganache is a must have for adding elegance to a dessert.
Colleen
Thanks!
Ntensibe Edgar Michael
I sooooo badly want to try this piece of delicacy. I love chocolate and this just could not look any better than this!
Colleen
Chocolate ganache is one of the best ways to enjoy chocolate, in my opinion. So silky smooth!
Michael
The photo is stunning. Makes my mouth water now. BRB. Buying anything sweet right now.
Colleen
Enjoy! 😀
Katie
I always thought ganache was so difficult to make because it looks so fancy but this makes me want to give it a try! Thank you!
Colleen
I was the same way! But really, all of the major issues are so easy to fix. The hardest part is just waiting for the right consistency for what you need.