

Pink Champagne Cake with Gelatin Bubbles


Pink champagne cakes are beautiful to look at and bring to mind delicious bubbly drinks and happy times. While the flavor is mild, it’s definitely not a bland cake. Top it off with pink champagne buttercream and beautiful gelatin bubbles for a dessert worthy of birthdays, Valentine’s Day, New Year’s, engagement parties, and more.
This page contains affiliate links which means I may earn a commission as an Amazon Associate (or other affiliate program) from qualifying purchases. I only recommend products that I use and trust.
This recipe was originally published on February 14, 2019. It was republished on June 1, 2023 with updates.
Jump to Recipe
Story Time
I first made this cake back in 2019, and it was only the second time I had ever done a drip cake! I’ve been wanting to update this gorgeous cake with better pictures and a video tutorial for a while. In fact, I’ve had a bottle of pink champagne in the fridge for over a year, so it was time.

The gelatin bubbles are a relatively simple, though time consuming, decoration. I had never even heard of this technique before it became the February challenge in the Sweet Arts Guild. They are a bit messy to make (well, for me at least), but they were the perfect topper for this pink champagne cake.
Pink Champagne Cake Deets
This luscious cake has four main elements; cake, frosting, white chocolate ganache, and gelatin bubbles. You can always simplify the cake down to just cake and frosting if you’re not feeling extra. No big D. Now, let’s get down to business…

(Anyone else singing Mulan now? Just me?)
Gelatin Bubbles
First of all, these look pretty gosh darn amazing, but don’t be scared. You got this! It is truly pretty easy, but there are some tips and tricks to getting better bubbles.
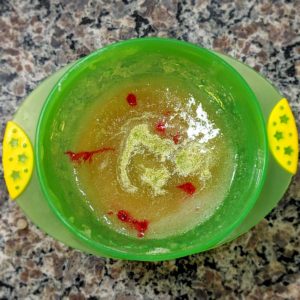
In a small microwaveable bowl, combine the gelatin and water, then set it aside to bloom for 3- 5 minutes. You can add your gel color and/ or pearl dust at any point. Microwave for 8 – 10 seconds and stir. Your mixture should be smooth and very pretty. You can pop it back in for another 3-5 seconds if it’s lumpy.
Wipe a thin layer of shortening on the balloons and dip them in the gelatin. You want a thin, even coat. As soon as you take it out, hold the balloon upright so that all the excess drips off. Tami Utley (creator of this technique!) uses a small paint brush to wipe off any lumps that don’t drip off the bottom. Give them about a minute to set before doing a second coat. Repeat for a third coat.
Gelatin Bubbles FAQs
What balloons work best?
I liked the small water balloons the best. They have the most rounded shape and are easy to work with. However, because they are so thin, you have to be gentle when pulling them out of the hardened gelatin.
How should I let them dry?
If you’re using regular balloons, you should be able to tape them to a toothpick and stand them up in a foam block. For the water balloons, I preferred to let them dry for 2 minutes in my fingers, then I taped them hanging down on my cupboard. Not pretty, but it worked! Watch the video tutorial for the gelatin bubbles to see my drying set up.

How do I store my gelatin bubbles?
Gelatin bubbles will last forever as long as you don’t get them wet. I suggest placing them in an air tight container, layered between wax paper if necessary. I still have my gelatin bubbles from a few years ago!
Are gelatin bubbles edible?
Technically yes, but they would taste terrible! I don’t advise eating them, but they are completely safe to be on your cake.
Related Reading: Devil’s Food Cake with Raspberry Buttercream
Pink Champagne Cake
You know how I kinda harp on the whole mise en place thing (think macarons and baking tips), well this right here is why. I was all set to get started on the cake, so I started pulling out ingredients. Guys! I ran out of all- purpose flour! Don’t ask me how, I don’t know.
Want to know something even weirder? That last paragraph was from my original post 4 years ago, and I ended up with the exact same problem this time around. Anywho, the moral of this story is to be prepared.
Top Tips for Cakes
- Make sure all of your ingredients are at room temperature. This will help everything blend nicely and give your cake a nice texture.
- Scrape down your bowl often. Butter and sugar can hide out at the bottom of your bowl. Make sure everything gets blended!
- Do NOT over mix. Once you add the wet and dry ingredients, keep the speed on stir and only mix to combine.
- Wilton baking strips will give you a flat top and prevent the edges from caramelizing.
- Use an electronic scale to divide your cake batter into the pans.
Back to the Cake…
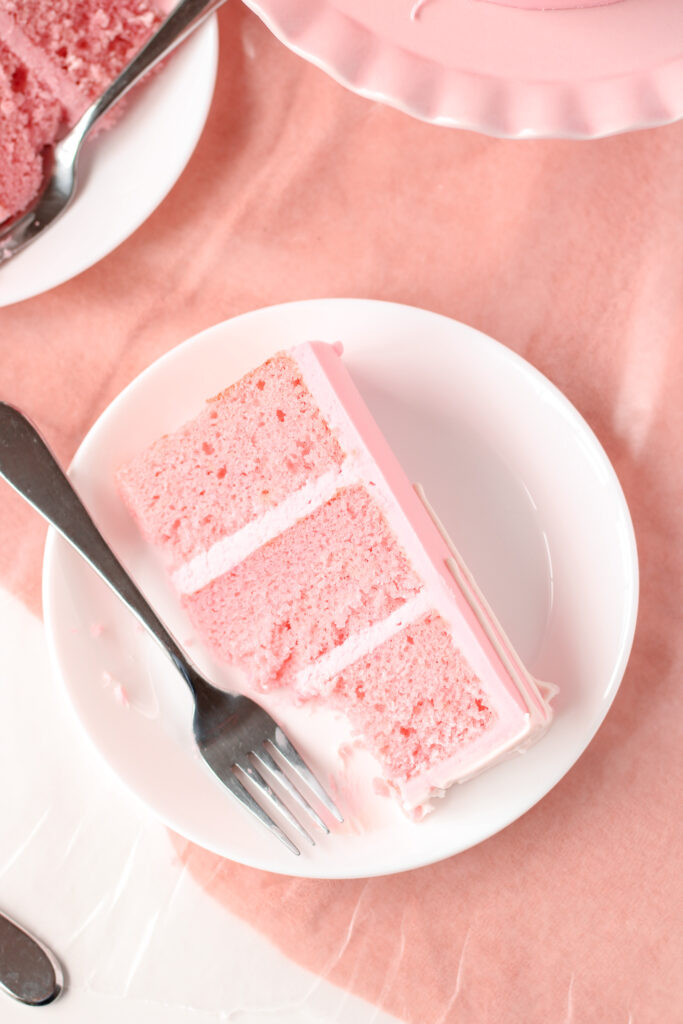
This pink champagne cake is basically a white cake, but made with pink champagne! I used carton egg whites because that’s a much easier option than separating all those yolks. This recipe also has a dash of almond extract. It brings out the fruity notes in the bubbly, but you could use sparkling wine flavor instead.
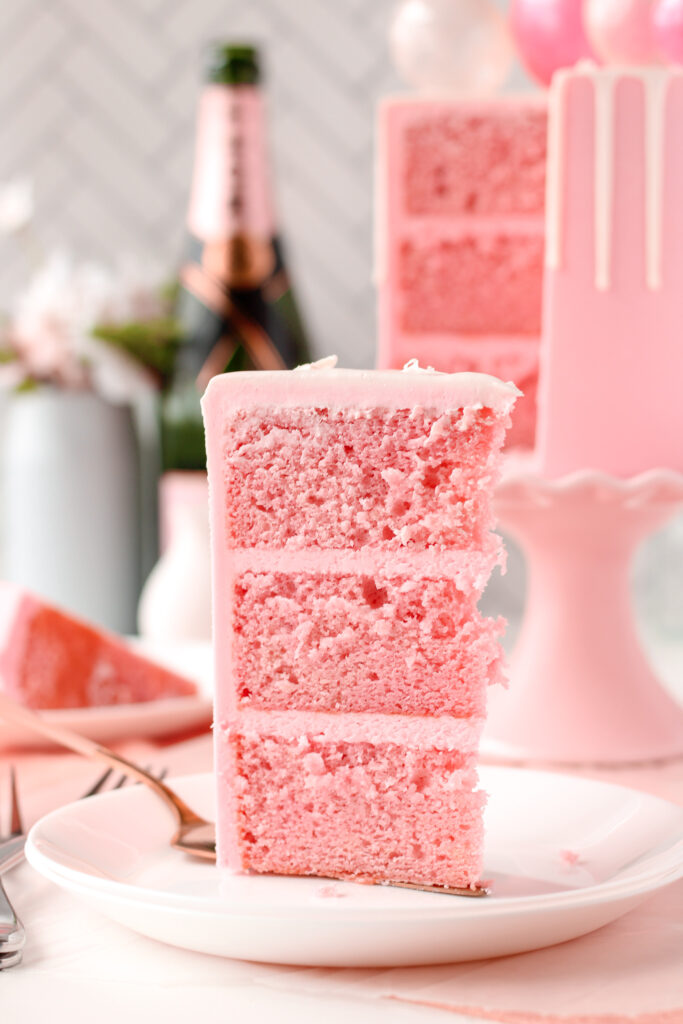
I was afraid the cake layers were going to come out too pink, but who’s going to complain about it being too pink. Not Elle Woods, that’s for dang sure. Feel free to make the batter any shade or color you choose.
Pink Champagne Buttercream Frosting
This stuff is pretty flippin’ delicious, just so you know. By reducing the pink champagne, we get a concentrated flavor that will add plenty of flavor to the buttercream. It has a fruity, yeasty flavor that tastes like pink champagne vapor. Goodness, that sounds confusing.
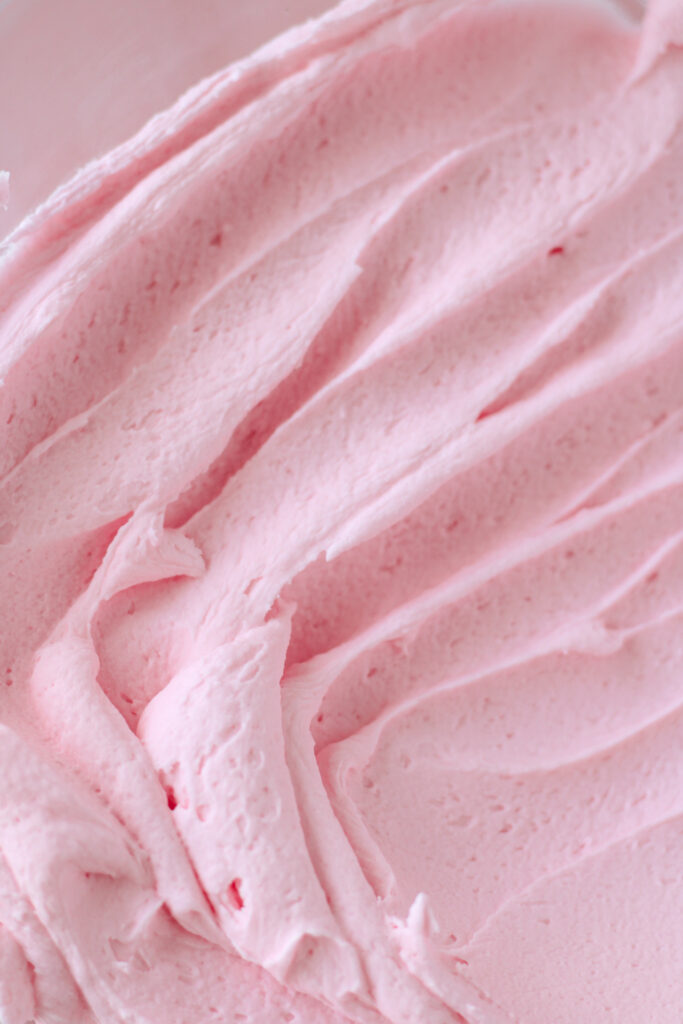
Just like the pink champagne cake batter, this frosting gets a dash of almond extract. Again, this just helps boost the fruity notes of the sparkling wine. If you want to skip the almond extract, you could rely solely on the booze, or add a bit of sparkling wine flavor.
Top Tips for American Buttercream
- Beat the butter alone on a medium speed for 8- 10 minutes to get it super pale and fluffy.
- Warm up your liquid (cream, milk, water, etc.) slightly to get a smooth buttercream. Cold liquid can curdle the frosting.
- Once you begin adding the powdered sugar, never go above a medium speed to avoid too many air bubbles.
- Add a pinch of salt to cut the sweetness.
Related Reading: How to Frost a Cake Using Acrylic Cake Discs
White Chocolate Ganache Drip
I decided to top my Pink Champagne Cake with a beautiful white chocolate ganache drip. This would serve several purposes. For one, the contrast of white against pink would be beautiful!

The white chocolate ganache also serves as the “glue” for my gelatin bubbles. I considered just pressing them into the soft buttercream, but ultimately opted for the ganache. After I topped my pink champagne cake with the ganache, I gracefully plopped my bubbles onto the soft chocolate. It sets up nice and firm.
Cake Timing
While this cake is not that difficult to make and assemble, it does require some planning and time management. The gelatin bubbles take 24+ hours to dry completely, so make them a day or two in advance.
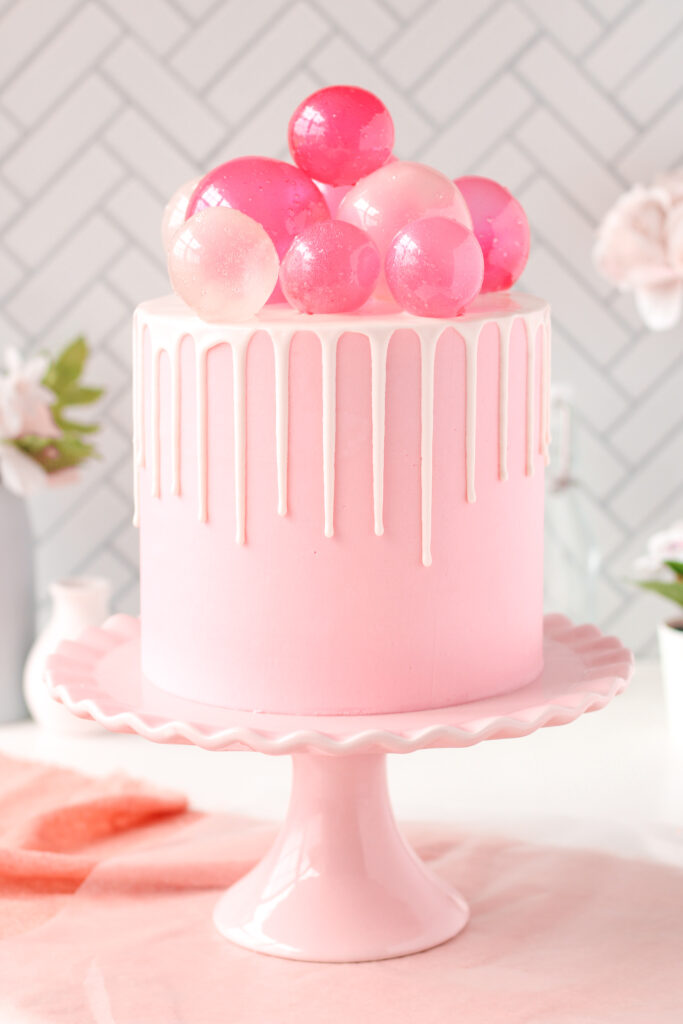
To make the final assembly go smoothly, I planned out the position of my gelatin bubbles, by placing them on an empty cake board first. Once I had the ganache on the cake, it was very easy to take the bubbles from my mock board and top them right on the cake.

Enjoy!
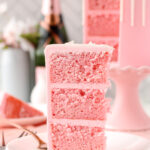
This Pink Champagne Cake with beautiful gelatin bubbles is a show stopper for sure! The pink champagne cake and buttercream are light in flavor, but the champagne adds a nice taste. The white chocolate ganache drip adds more flavor to the mild cake and is yet another decorative element you can use to wow your guests.
If you give these bubbles a go, let me know how it works! Don’t forget to pin this post so that you can find all of these great resources again.
Pink Champagne Cake with Gelatin Bubbles
Ingredients
Gelatin Bubbles
- 4 pkgs unflavored gelatin
- 8 Tbsps cold water
- pearl or luster dust
- food color gel or liquid
- shortening
Pink Champagne Cake
- 8 oz all- purpose flour
- 3 oz cake flour
- 1 oz dried buttermilk
- 2 1/2 tsps baking powder
- 1/2 tsp salt
- 7 oz unsalted butter room temperature
- 13 oz sugar
- 2 Tbsps cake enhancer optional
- 1/2 tsp clear vanilla
- 1/2 tsp almond extract
- 2 drops deep pink gel color
- 6 fl oz carton egg whites room temperature
- 8 fl oz pink champagne room temperature
- 3 Tbsps canola oil
Pink Champagne Buttercream
- 8 fl oz pink champagne
- 16 oz unsalted butter room temperature
- 32 oz powdered sugar sifted
- 1/4 tsp almond extract
- 1/2 tsp almond extract optional
- 2 drops deep pink gel color
- pinch of salt
White Chocolate Ganache
- 3 oz white candy melts
- 1 oz cream
Instructions
Gelatin Bubbles
- In a small microwaveable bowl, add the cold water and gelatin. Stir to combine. Let the gelatin bloom for 3- 5 minutes. I like to work in batches, with 1 package of gelatin to 2 tablespoons of cold water at a time. Make each batch a different color if you want.
- Use a toothpick to add gel food color to the bloomed gelatin. A little goes a long way. Sprinkle the pearl dust on top. Microwave for 8- 10 seconds, then stir until smooth. If necessary, microwave for an additional 3- 5 seconds if it is still lumpy.

- Smooth a thin layer of shortening on your tied balloons. There shouldn't be any white chunks of shortening visible. If you use too little, the balloon will be difficult to remove. If you use too much, the gelatin won't stay on the balloon.
- Dip your balloon in the warm gelatin, turning to evenly coat. Immediately lift the balloon upright and let the excess drip down. Use a small paint brush to wipe off any excess on the bottom.
- Allow the balloon to dry for about a minute or less before applying a second coat. Repeat for a third coat. Reheat the gelatin as frequently as necessary for 3-5 seconds at a time. If it becomes too cool, it will be lumpy and not coat the balloons evenly.
- Stick balloons in a foam block or hang upside down and allow them to dry for 24 hours.
- When the gelatin bubbles are completely dry, they will feel a bit like plastic or glass and will not feel like rubber. Once dry, snip a small hole in the base of the balloon. Allow the air to escape and gently pull the balloon away from the gelatin bubble. You may need to stick your finger in them to help it along.
Pink Champagne Cake
- Preheat the oven to 325℉. Spray three 6 inch cake pans with Baker's Joy, line with parchment rounds, and set aside.
- Sift the flours, dried buttermilk, baking powder, and salt together and whisk to combine. Set aside.
- In a stand mixer, beat the butter, sugar, and cake enhancer until light and fluffy, about 5- 8 minutes. Scrape the bowl down 1- 2 times during this step.
- Add the egg whites in 4 additions, beating until combined after each one. Scrape the bowl down as needed. Add vanilla and almond extracts and beat until combined, about 30 seconds.
- Alternate adding the dry ingredients and champagne. Combine thoroughly after each addition. Add one third of the flour mixture, beat on low to combine, then add half the champagne, mix to barely combine, then scrape the bowl down. Add another third of the flour mixture, beat on low to combine, then add the rest of the champagne, mix to barely combine, then scrape the bowl down. Add the rest of the flour, beat to just combine, then finish folding the batter with a spatula.
- Pour 14 oz of batter into each of the three pans. Smooth into an even layer and wiggle a skewer through each pan to remove any air bubbles.
- Bake for 50- 55 minutes. The edges of the cake should be pulling away from the pan and the top should spring back when you touch it. Cool in the pans for 10- 15 minutes before inverting to a cooling rack. Cool completely before frosting.
Pink Champagne Buttercream
- In a small saucepan, bring the pink champagne to a boil and cook for about 10- 15 minutes or until you have reduced it to between 2- 3 fl oz. Set aside to cool slightly.
- Beat butter on a medium speed, scraping the bowl down several times, for 8- 10 minutes. It should be very pale and fluffy.
- Add the sifted powder sugar in roughly four additions. After each addition, beat on low to combine, then gradually increase the speed to medium and mix for a minute or two. Scrape the bowl down, add the next addition, and repeat until all of the powdered sugar is incorporated.
- Add the almond extract and beat to combine. Add the reduced pink champagne a tablespoon at a time until you have the consistency you want. Add pink gel color and beat until combined.
- Taste and add a pinch of salt if the frosting is too sweet. Adjust flavors as needed.
White Chocolate Ganache
- Warm up the cream in the microwave for 15- 20 seconds. Pour over candy melts and begin stirring. Microwave the mixture in 5- 10 second bursts until melted. Stir well after each burst until you have a smooth ganache.
- The ganache is ready for the drip when it reaches 95℉.
Assembly
- Place a thin layer of frosting on your cake board to hold the cake in place. Place your first layer down and apply a layer of frosting. Repeat with remaining layers. For a flat top, place your final layer upside down.
- Apply a crumb coat to the cake and place in the fridge to chill for 15- 30 minutes.
- Apply a final layer of pink champagne frosting to the cake. Use your bench or cake scraper to smooth the sides. An offset spatula is handy for smoothing out the top, though the scraper works well too.
- Place frosted cake back in the fridge for 15- 30 minutes to chill and firm up. Make the ganache when the cake is nearly ready to be decorated.
- Apply white chocolate ganache and allow it to drip down the sides. While the ganache is still tacky, top the cake with your gelatin bubbles.
- Place your cake in the fridge to firm up. Let it come to room temperature for at 30 minutes to an hour before serving.
Notes
- Liquid food color will work in the bubbles as well, but gel gives you a more vibrant color. You must use gel in the frosting.
- Prepare the bubbles at least one day in advance and make more than you need. Some may crack.
- Depending on how you cut this cake, you could get 16- 24 servings.
- You will have extra batter. I like to use it to make cupcakes (bake at 350F for 21 minutes) or mini cupcakes (bake at 350F for 12 minutes)
My Favorite Products For This Recipe

Colleen
Hi there! I’m Colleen, a novice baker with a passion for learning and improving my bakes… and blunders. On Bakes and Blunders, you can find all sorts of tasty recipes that range in difficulty, but most importantly, I’ll try to explain the reason behind important steps. If you know why a recipe works, you can tweak and adapt it to suit your unique tastes, and you’ll be able to reliably produce some very delicious treats. If you love baking and want to expand and grow your skills, or if you are a casual baker and just need some pointers, my blog is right up your alley! Join me on my baking journey and we’ll learn how to make more impressive recipes together.

Cinnamilk Cupcakes And A Good Book


8 Comments
The Baking ChocolaTess
That’s so very impressive! Pinned!
Colleen
Thank you 😀
Veronika
Hi, thank you for the recipe and your edible bubbles tutorial. May I have one question? Since the cake is decorated, will the bubbles hold their shape? I mean what if I put the
cake in the fridge for a couple of hours or overnight, will they last?
Thank you!
Colleen
The bubbles are definitely fine on the cake for at least a few hours. I believe my leftovers stayed in the fridge for a day or two and were fine, but I can’t remember. If you need to decorate in advance, I would store the cake in a cardboard box (it absorbs extra moisture) or in a container. The bubbles might soften, but they shouldn’t melt with just a few hours in the fridge. Let me know how it all works out for you!
Ducks 'n a Row (@SineaPies)
Oh my goodness, this is AMAZING Colleen! Pinning it and sharing it, too. Is it really that easy to make? I might get my grandgirl to help me and we will give it a try1
Colleen
Thanks! It really is a lot easier to make than you’d think. Honestly, the hardest part is that I felt it couldn’t really be that simple. It is a bit messy and some of the bubbles will turn out horrible, but once you get started you kinda get the hang of it. I definitely suggest scanning through the tutorials I listed as well. It can be helpful to read about everyone’s slightly different take on the technique. Let me know how it goes!
Nicole
Beautiful! great tutorial!
Colleen
Thank you! It’s the most interesting looking cake I’ve ever tried and it turned out to be simpler than it looks. A bit messy though 🙂