

Tips From a Beginner Cake Decorating Class


Cake decorating is a daunting task when you’re a beginner. How do you get smooth frosting? Why are there crumbs everywhere? What is a simple look I can pull off? Although I’ve made a lot of cakes this year thanks to the Sweet Arts Guild, I decided to take a Beginner Cake Decorating class. Come check out all of the tips and tricks I have to share with you!
This page contains affiliate links which means I may earn a commission if you use them. I only recommend tools that I use and trust.
Beginner Cake Decorating Class
I absolutely loved the Classic French Macarons class that I took a few months ago. Since then, I’ve signed up for several other classes, but between bad weather and cancellations, I haven’t been able to make one. Until now! I was so excited for this cake decorating class, even though I am pretty comfortable with the basics.
For this post, I’m breaking the cake decorating tips down into two categories; cake assembly and cake decorating. We all want to learn how to create gorgeous cakes, but first you’ve got to lay a great foundation by putting your cakes together the right way. The whole “walk before you can run” thing, ya know?
Cake Assembly
Level and Torte Your Cake
Sometimes you get lucky and a cake comes out of the oven with a beautiful flat top. But, you probably find that they frequently have a bit of a dome instead. You don’t have to try for a perfectly flat top, but go ahead and level off the majority of the hump.

Torting your cake means to slice it into multiple layers. With my favorite Wilton layer pan set, this isn’t a thing I ever have to do. You can absolutely buy a cake leveler (I want this one!), but a good bread knife will work just fine. Place your left hand (non-dominant hand) on the top of the cake to stabilize it.
CAREFULLY work your knife around the edge of the cake, cutting an inch or two into the cake. Once you make it all the way around, gently slide your way through the rest of the cake using your previous cuts as a guide. This will take some practice to get it level. Mine was a bit wonky after I took the top layer off, so I just shaved a bit off of the higher side.
Fake a Flat Top
Okay, that top is still a bit sketch, what can I do? I’ve got two fixes to fake a flat top. First option. Make the top of the cake the bottom layer. Now the unsightly remains of the dome will be sandwiched between cake and frosting. Place the bottom of the cake upside down on the top. This will give you a lovely flat top and all of the crumbs will be facing the inside of the cake.

Second option. Keep the bottom of the cake as the bottom layer. It’s flat and sturdy, so it will provide your dessert with a good base. Invert the top layer so that the cut side faces up. This will also give you a gorgeously flat cake. The problem here is that all of the crumbs on the cut side could get in your frosting. Just make sure to give the cake a good crumb coat and chill before finishing off with the final layer of icing.
Filling is My Jam

Usually, I fill my cakes with more frosting. It’s easy and reliable. But I’m so glad I learned the best way to fill a cake with jam, jelly, or fruit curd. First, pipe a border of frosting around the edge of the cake layer. Carefully spoon a scant amount of filling evenly over the cake. This filling should be lower than the edge of the frosting border. That frosting fence will keep the top layer stable and prevent the filling from squirting out the sides.
Make the Crumb Coat a Breeze

It’s important to trap all of those annoying crumbs in a thin layer of frosting before you move on to decorating. I prefer just using a wide round nozzle or an empty coupler to cover the cake with frosting before smoothing. But, I got to play with a wide, flat tip that I’ve seen other bakers use. This tip is going to make crumb coating your cake so quick and easy. Just make sure to use firm, even pressure and keep the tip close to the cake. (Find it on Amazon HERE!)
Cake Decorating
Buttercream Rose
Those beautiful roses you see on supermarket cakes look so complicated to make, but they might be easier than you think. Make a little mound of frosting on a flower nail. The bigger the mound, the bigger the flower. Use a petal tip to create the rose. Here’s a great video tutorial because there is no way I could describe this well enough. Update: I made a video about making buttercream flowers on my new YouTube channel!
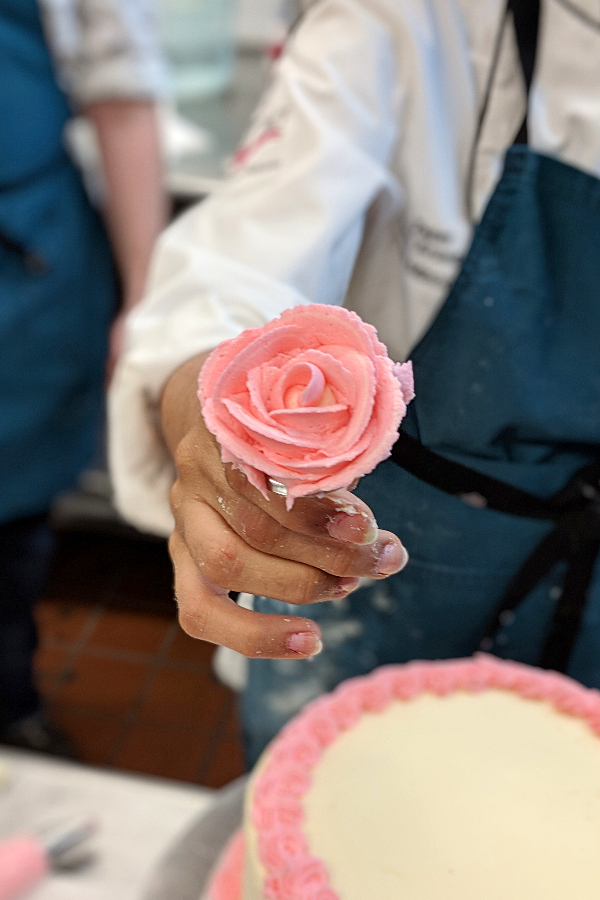
Use scissors to clip the rose off the nail and then use the bottom of the nail to push the rose off the scissors and onto the cake. We didn’t have time to let our flowers freeze in the class. If you’ve got the time, attach a small square of parchment paper to the nail and build the flower on that. Now place that paper in the fridge or freezer to firm up. It will become firm enough that you can gently handle it and easily place it on your cake.
Marbled Frosting
Even though our instructor spent two hours before class making 90 lbs of buttercream, we started to get low by the time we were on our second cakes. I had a bag of plain frosting, a bag of green, and a bag of yellow and I needed to use it all. So I went for a marbled effect that actually turned out really pretty!
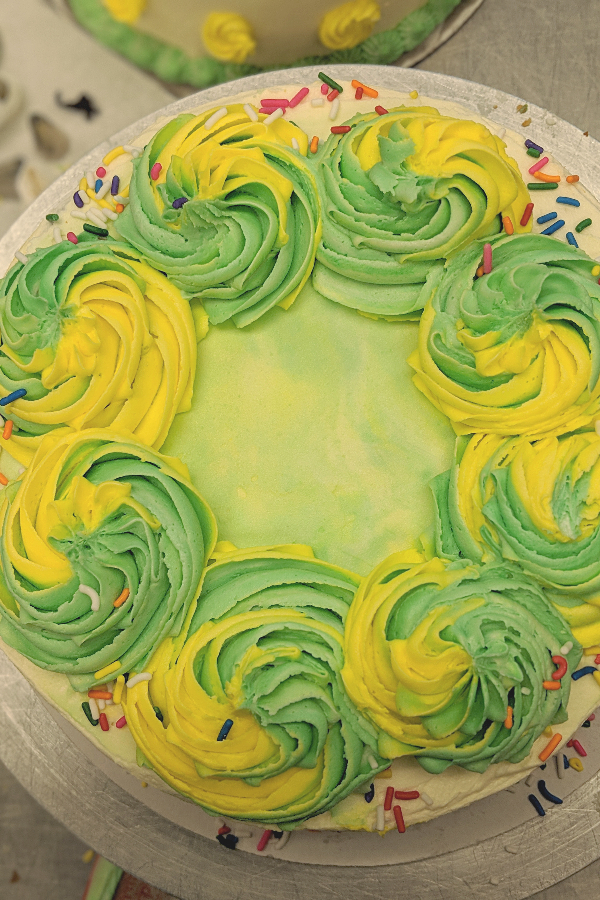
First, frost your cake in the uncolored frosting. Using an offset spatula, tab random splotches of color onto the sides and top of your cake. Don’t overdo it here because a little goes a long way. Use your scraper to smooth out the sides and top again. This will blend the colors together beautifully. It’s a great cake decorating technique because it’s supposed to be imperfect.
Two Tone Swirl
But I still had a ton of colored frosting and I needed to decorate the top with big swirls. What was a girl to do? I used my spatula to fill one side of a giant piping bag with the yellow frosting. Then I filled up the other side with the remaining green frosting. Gently shake and squeeze the frosting down to the tip. Squeeze a bit out until you see both colors coming out. Now pipe away!
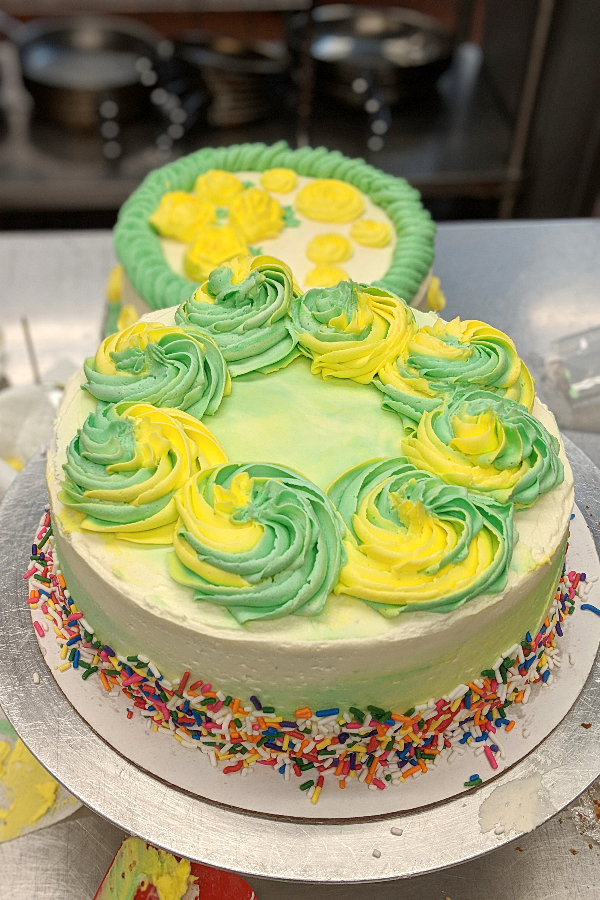
And I’ve got a trick for evenly spaced swirls. Pipe your first swirl. Now rotate the turntable a full 180° and pipe a swirl directly opposite the first one. Rotate the turntable 90° and pipe another swirl. Turn the cake around again and pipe a fourth swirl directly opposite of your last one. You now have four evenly spaced swirls! Leave this as is or fill in the gaps with swirls.
Sprinkles Make Me Happy
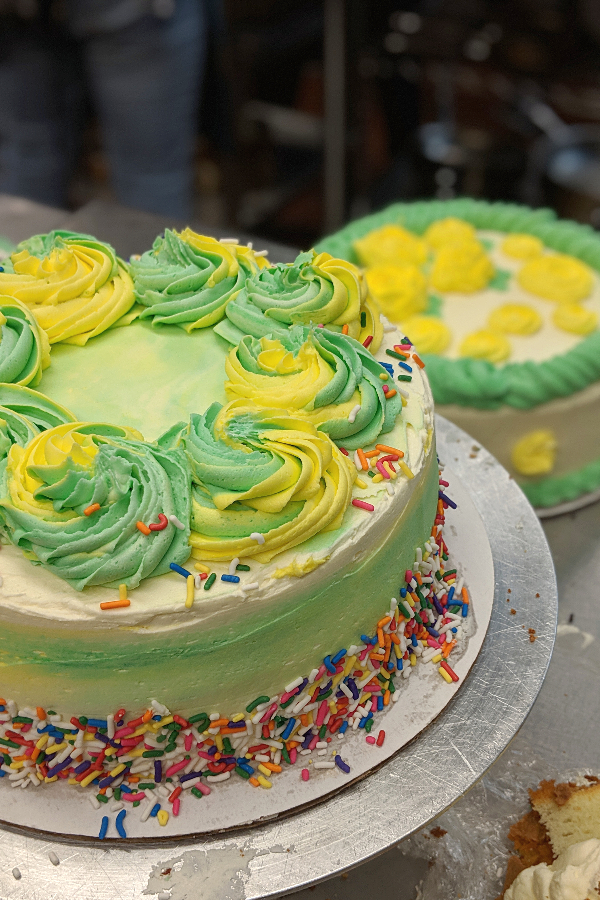
These sprinkles did not match my cake design at all, but how could I resist playing in a tub of the fun stuff? This cake decorating technique is also pretty crazy easy. With your cake on a cake board, hold it in one hand over a tub or baking sheet. Gently press handfuls of sprinkles along the bottom of the cake. Brush off any excess sprinkles from the board. It’s that easy.

Cake Decorating 101
Now you’ve got some basic cake decorating tips and ideas. If you can’t get enough cake information, be sure to check out my own list of cake tips and tricks and find out what tools you need! I can’t wait to see what you make. You can tag me on Facebook or Instagram if you use any of these tricks on your next cake!

Colleen
Hi there! I’m Colleen, a novice baker with a passion for learning and improving my bakes… and blunders. On Bakes and Blunders, you can find all sorts of tasty recipes that range in difficulty, but most importantly, I’ll try to explain the reason behind important steps. If you know why a recipe works, you can tweak and adapt it to suit your unique tastes, and you’ll be able to reliably produce some very delicious treats. If you love baking and want to expand and grow your skills, or if you are a casual baker and just need some pointers, my blog is right up your alley! Join me on my baking journey and we’ll learn how to make more impressive recipes together.


12 Comments
Sabrina Addams
I loved that you explained how to achieve of two-toned frosting swirl by filling one side of the piping bag with one color and the other side with the other color. My sister and I are wanting to learn how to decorate cakes as a way to spend more time together. I will try out some creative tips like multi-colored frosting with her.
Colleen
I’m glad you liked it! Multi-colored cakes are so fun. Enjoy your cake decorating!
Michelle @momsarefrugal
Your cakes look really great! I have taken a few cake decorating classes and each year try to get better. Roses and the crumb coat so far have been the hardest for me to master!
Colleen
Thanks! Roses are definitely a bit tricky, but practice and firm buttercream help. Crumb coats don’t need to be perfect, and I sometimes forget that. I have to remind myself that I’m trying to trap crumbs, not make it look pretty.
Michael
Good thing I stumbled upon this. I might start baking soon too! So excited Haha! Baking is like a therapy for me
Colleen
Baking is therapeutic for me too. Love tackling a recipe to get my mind off of anything that’s bothering me.
Lyosha
very nice tips! I do believe any cake is good but making the cake look pretty totally adds up to the desire to eat it all NOW
Colleen
Glad you liked the tips 🙂 Just a few things can make your cakes look super pretty.
Ritz
Girl!! This look so much fun! How long the class took? We should go to a class together! 😊 maybe with sugarpaste flowers or buttercream flowers or anything lol
Btw, keep it up! 👏👏
Colleen
Thanks! The class was 3 hours long. I’ll let you know next time I see the intermediate cake decorating class because I want to do that next. It would be so much fun to go with you! I just made gum paste flowers for the first time today. They turned out pretty decent. I’m going to go post some pics on my FB page 🙂
Monidipa
I have never made a cake in my life. But yes, your tutorial is very well written and explained.
Colleen
If you ever decided to try your hand at one, I hope these tips help you 🙂